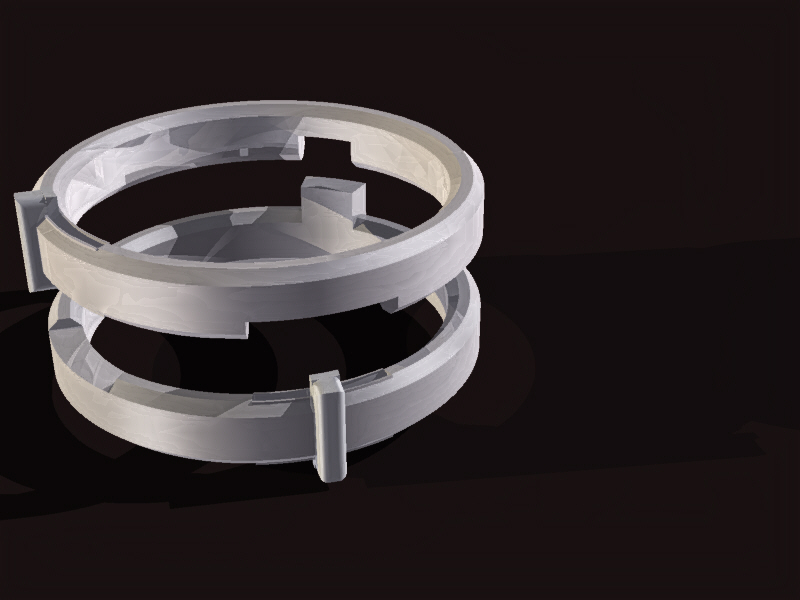
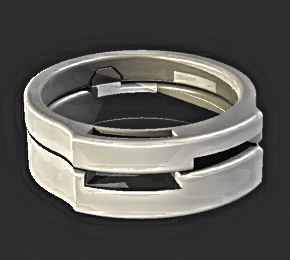
Caliper Ring
--- Sterling Silver Caliper Ring --- Prototype

not picture is the measurement etching
I am designing a pair functional rings from non-ferrous metals. I plan to execute this ring twice, once using a CNC - machining it from 7075 aluminum - and once by hand -using sterling silver -on a milling machine and hand shaping techniques.
not picture is the measurement etching
This ring is meant to function as a caliper which measures imperial thicknesses to the 32nds.
I went to Myron Tobak , in the diamond district, planning on purchasing silver stock (about a half hour of time??). I ended up being assisted by Zachary, Mr. Tobak's grandson, who ended up advising me for over an hour and a half, helping me refine my plans. I cannot recommend more emphatically, Myron Tobak. (also, lesson confirmed- bring your CAD with you everywhere!)
So I purchased some silver stock ==

Now I had some stock to design around! I also had some wonderful notes from Zachary.
not pictured are caliper nibs and measurement etching

not pictured are caliper nibs and measurement etching

not pictured are caliper nibs and measurement etching
So I designed down the cad to a 2-D blueprint in order to have a transfer to the stock.

To get machining- I have to face my metal.
The silver is not "true" - not flush/flat.
(This should be checked on a machined true surface)
So I started filing and sanding.

I felt that this process would be a slower process, yes, and would remove the same amount in the end as using the mill to face the silver.
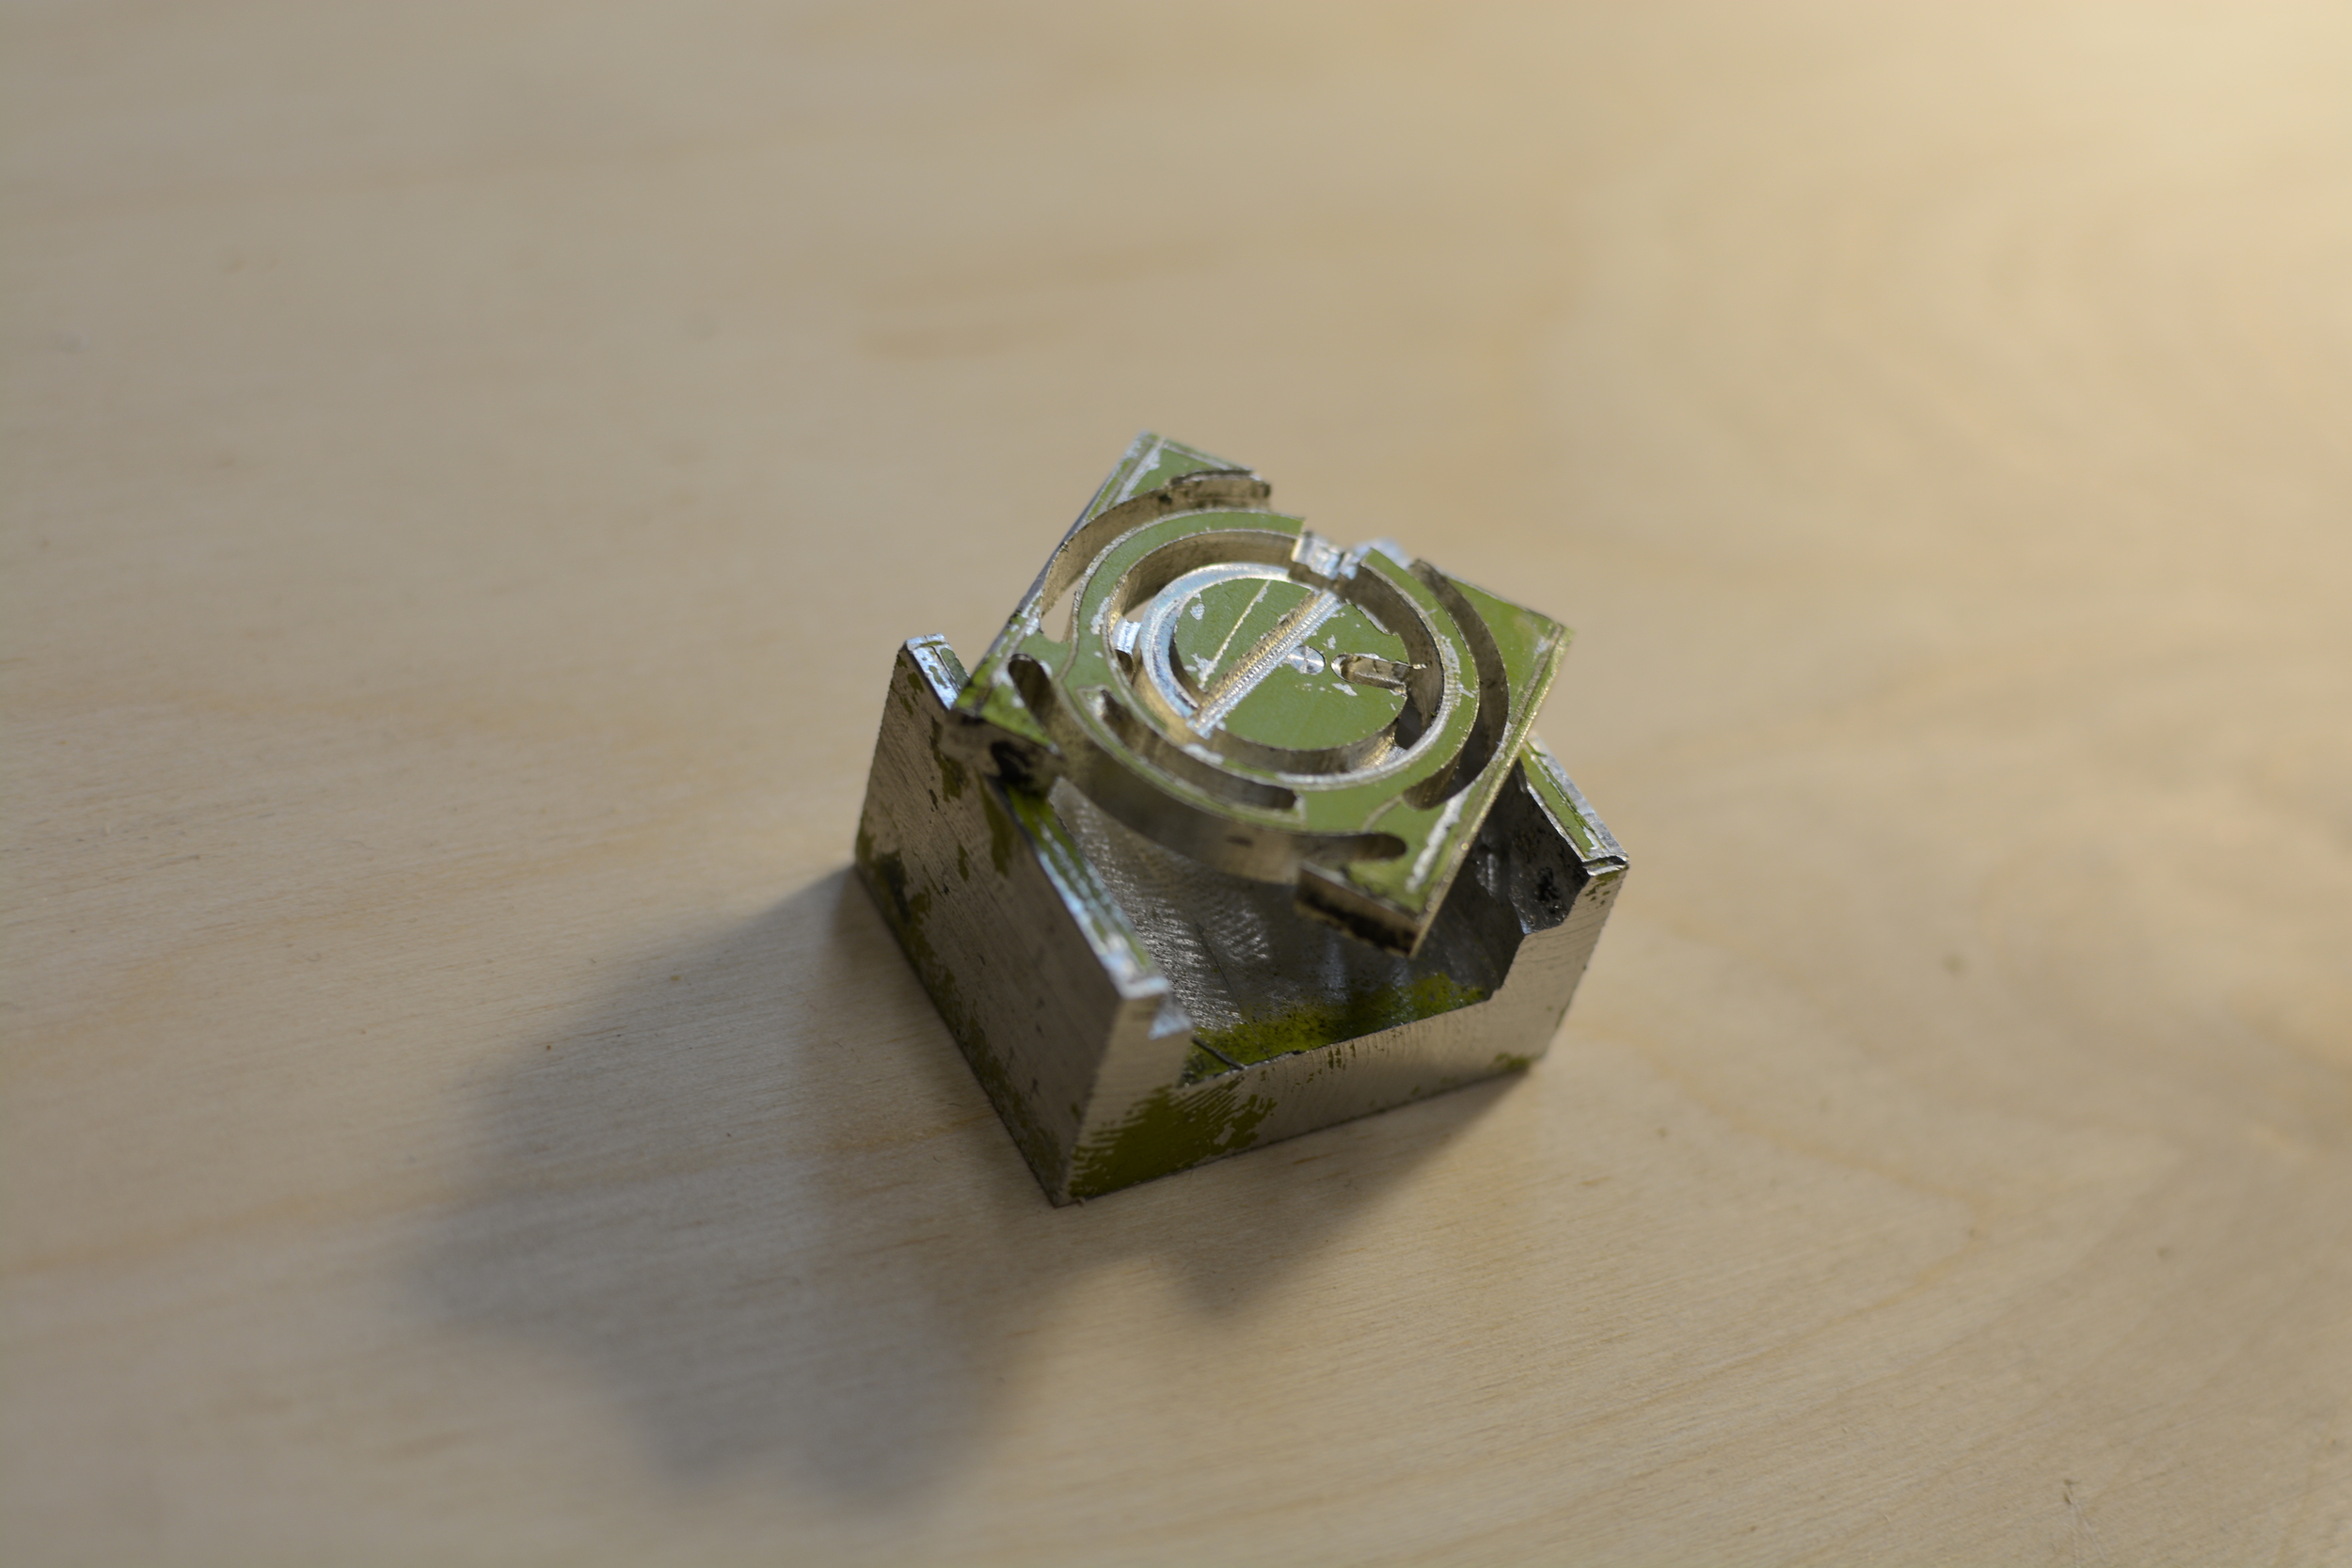
So I started trying to face the silver on the vertical mill. Because of the precious nature of the material and that I will be using almost all of the material, and I will be using a rotary table on the mill with only large strap clamps, I need to make some jigs to hold the material down and flush - basically making my own vise and parallels.

So facing the sides of the ring proved a wasted venture. Because silver is so soft, making it tightly fit into any jaw with enough tension to be secure and yet not obstruct machining, was a fun problem. (I preemptively Sprayed the silver stock black, in prep for laser etching the blueprints on).
I began machining some 6061 aluminum to press fit the silver into - leaving enough room to to then press the two sides overhanging on the silver to secure the entire jig - with strap clamps-on the rotary table.


I was wary of press-fitting the silver into the jig. I wanted to do this right before machining, but I felt that the blueprint etching might warp when pressed in, therefore, my silver and went to laser - warped and all--

So there is some curvature to the silver in the 6061 parallels - i.e. the metal is certainly NOT flush/flat/parallel. I'm ok with this.... I will do some cutting operations and then work it out. It might be like polishing a turd - getting the metal trued- at any stage- but as long as the measuring channels and face are not manipulated, it should be fine.
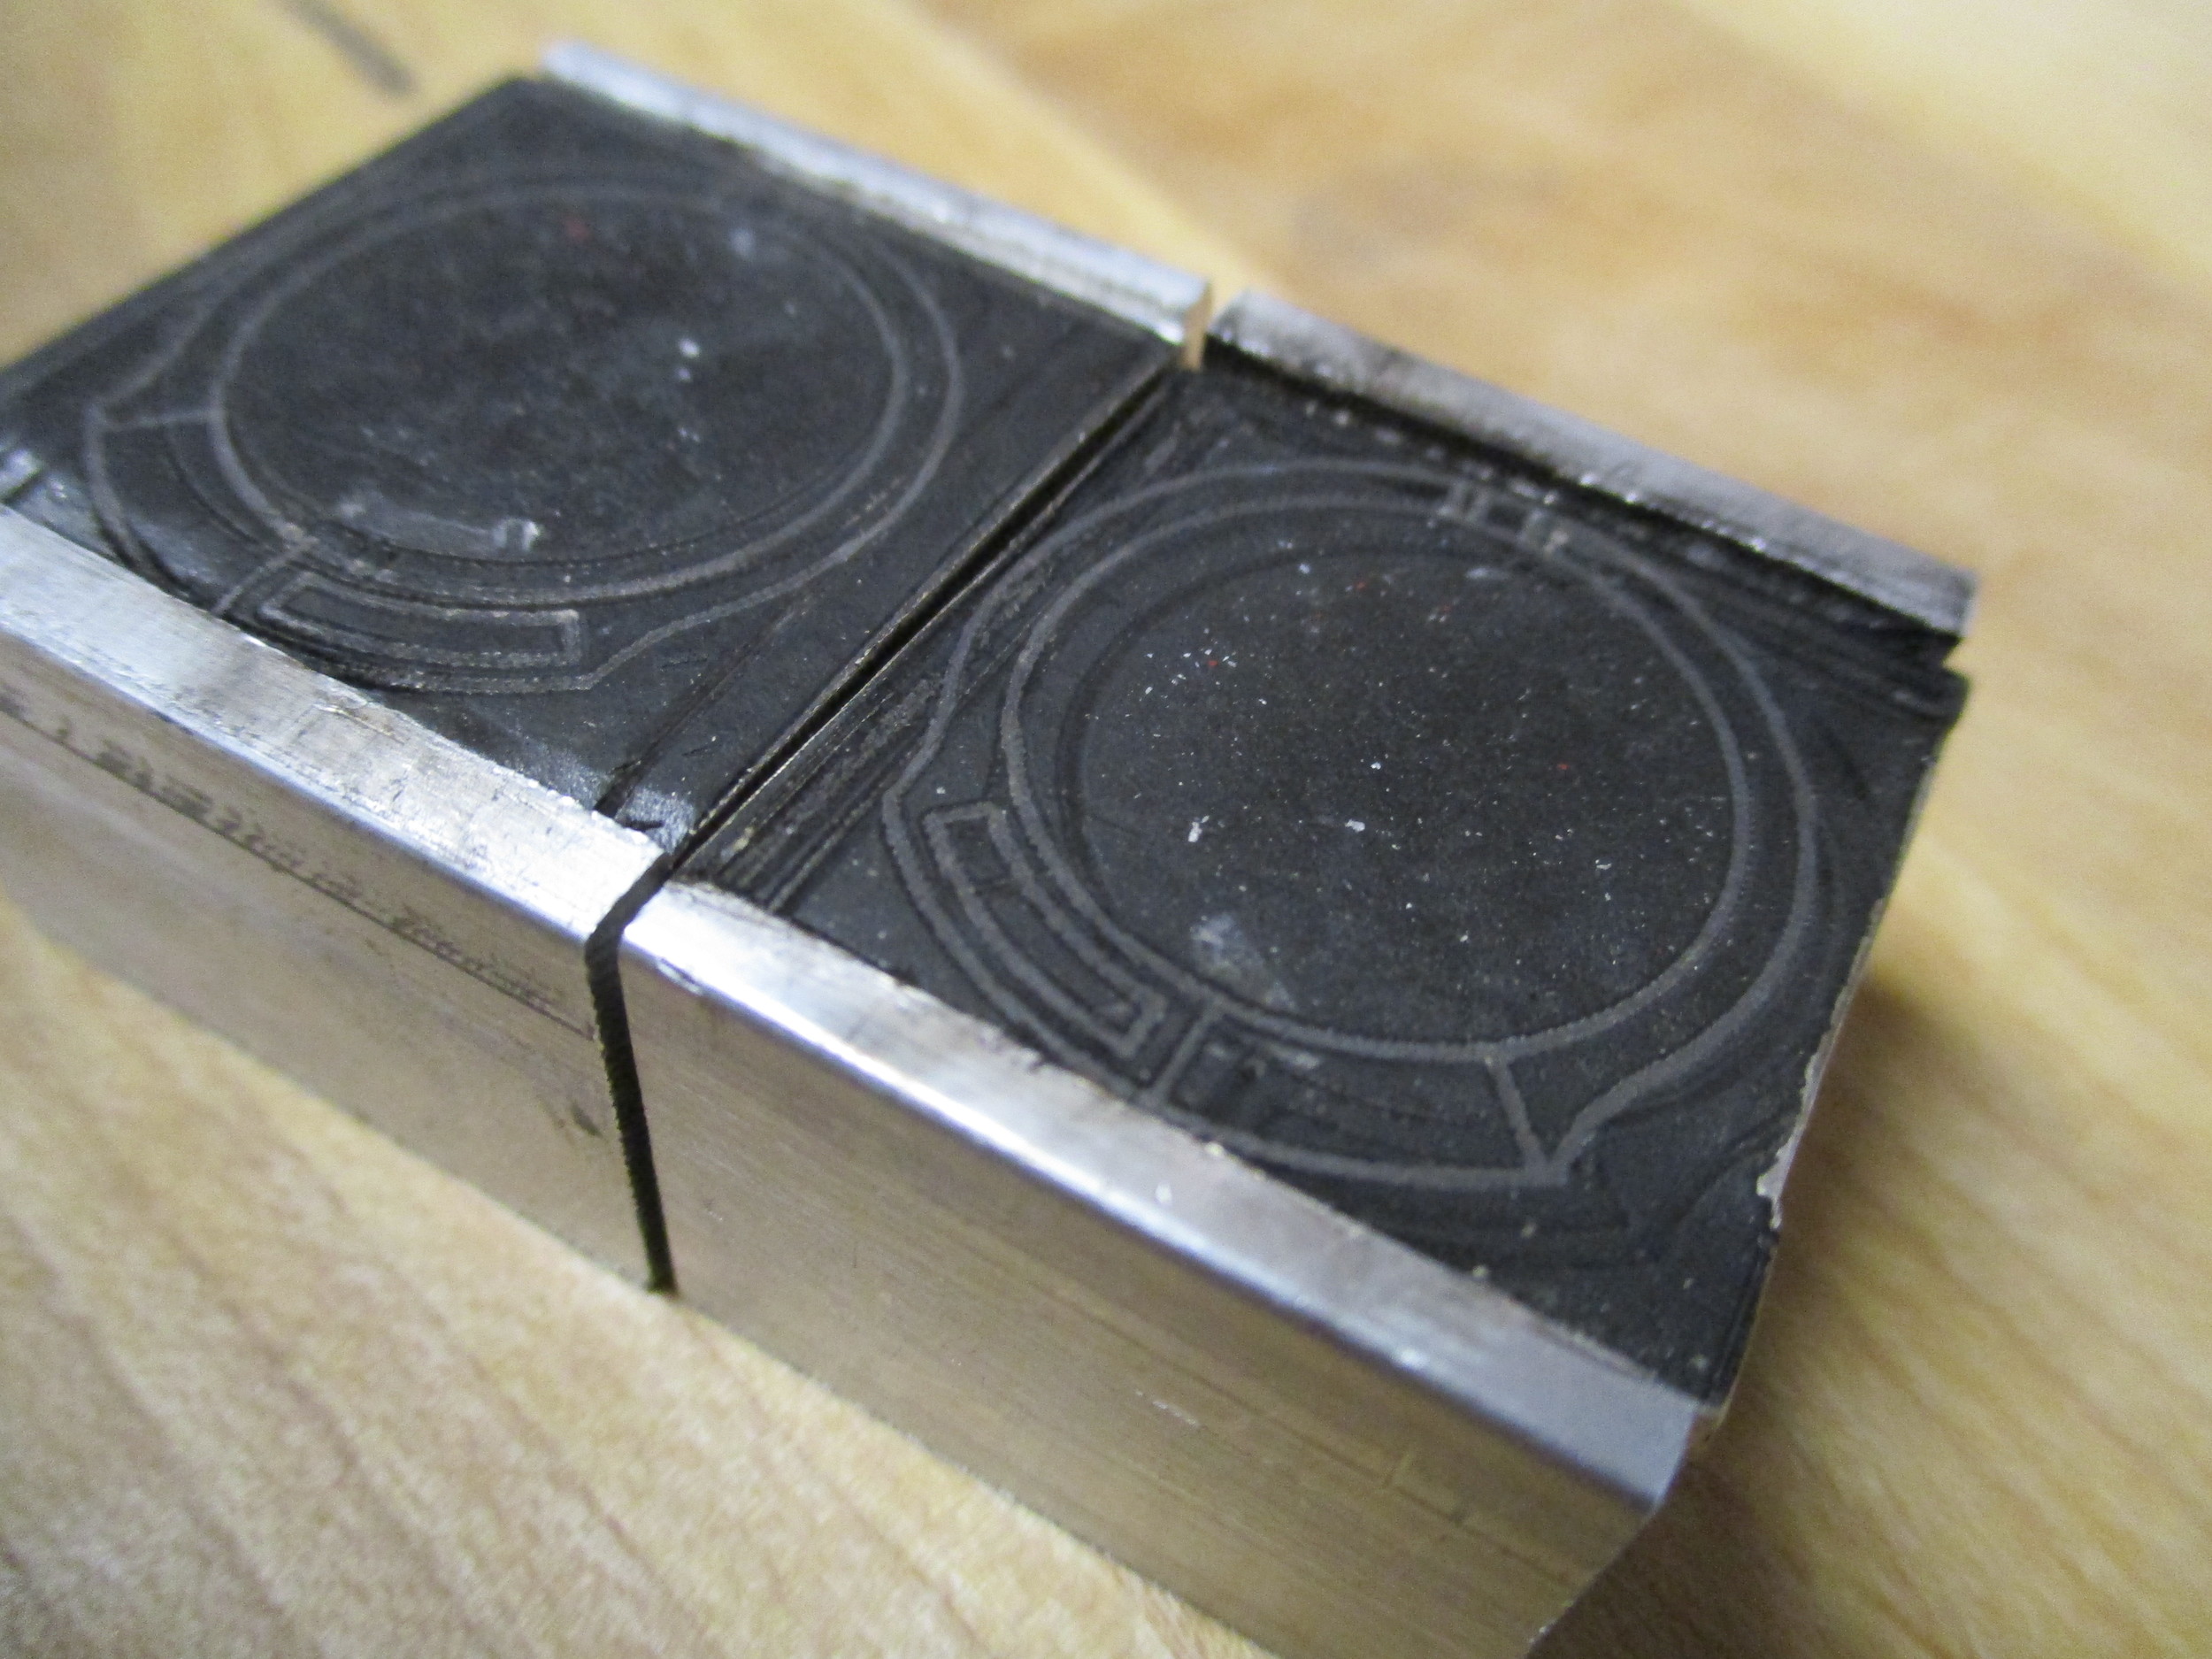
I ran the 2-D blueprint file. NOTE: the laser cutter is not made for seriously tight tolerances (hence the subtler etchings).
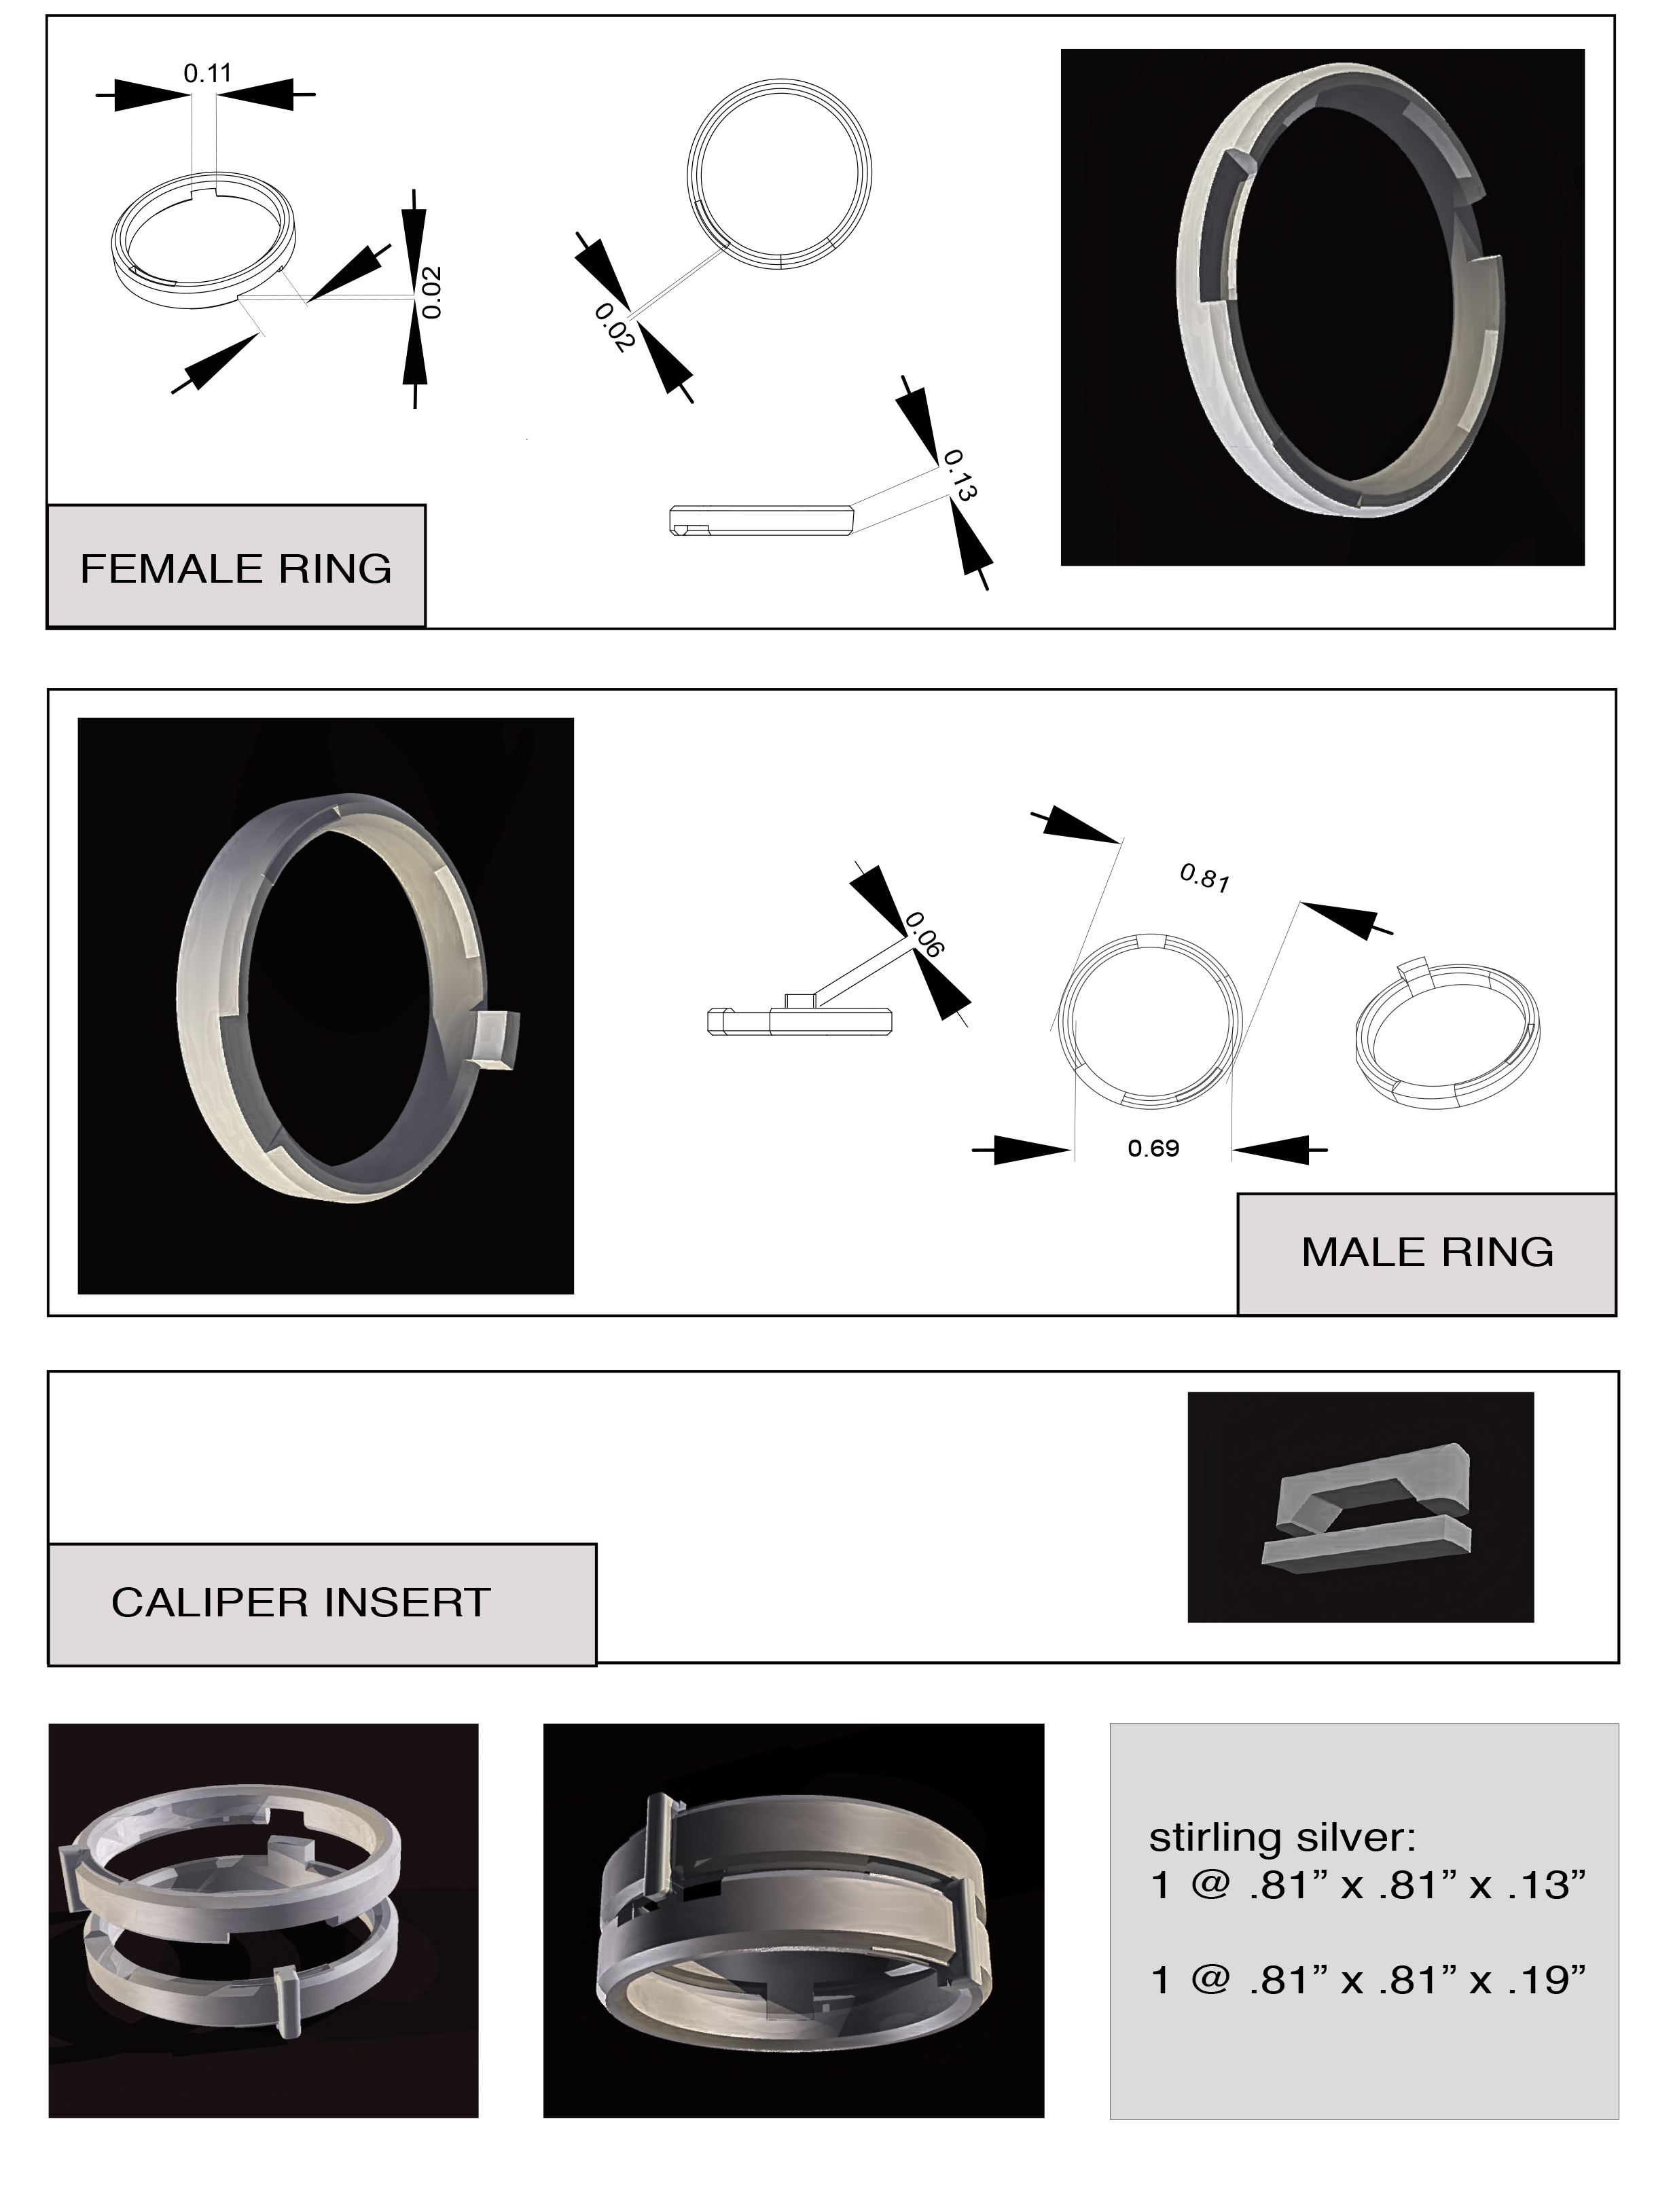
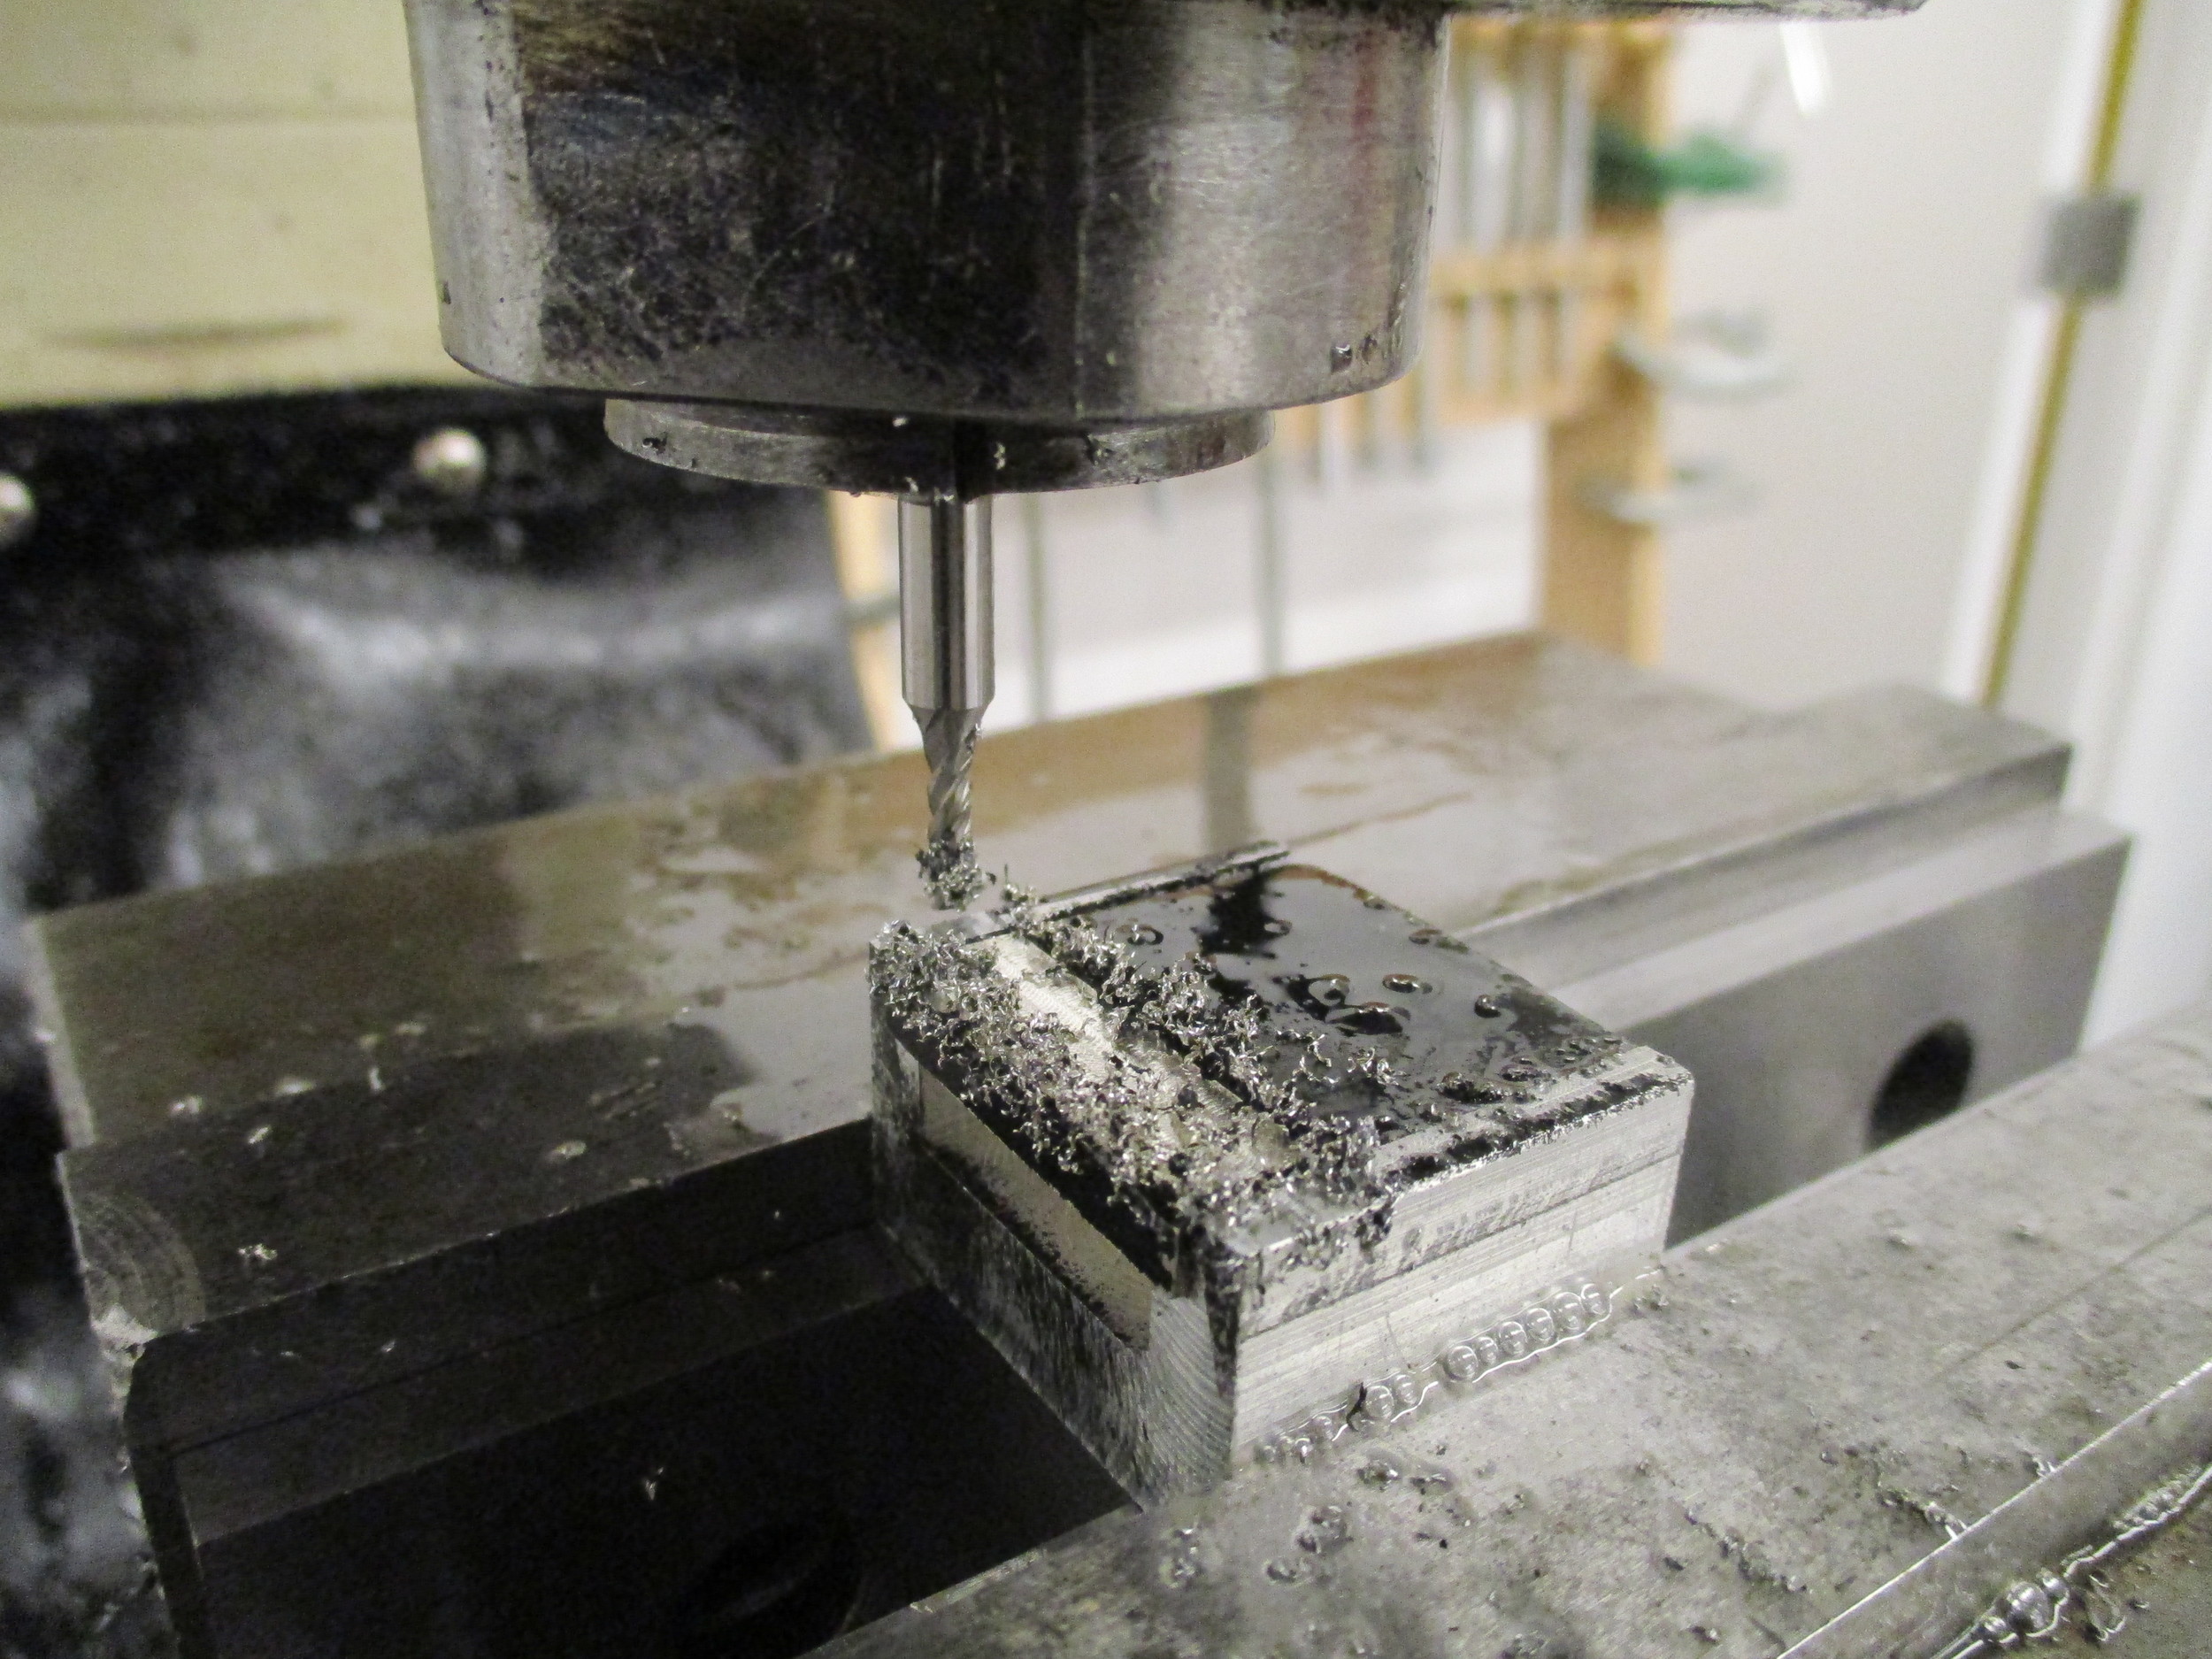
I decided to redesign the ring. There were components of the above design that just did not feel super flushed out:
Having two caliper nibs moving on two distinct channels means that they will always be flapping about - no way to hold them, clasp them, making the ring potentially annoying to wear.
Making one ring the moving ring and providing the other a post.
I am currently considering the mechanism to hold the caliper nib to the post on the right.
I will likely change this design again, but I believe I have enough to begin machining.


In considering how to machine this ring - and how to go about the most secure methodology for holding the work, cutting the inside parts etc - I decided that the aluminum jig should be flush to the silver (keeping the tiny bits safe).
I faced the silver and aluminum.


To machine circular operations, I needed to use the rotary table.

to get set up- I needed to make the center of the rotary table center to the spindle.
I set a live center in the center and a center drill in the spindle and mated them. tip-to-tip.

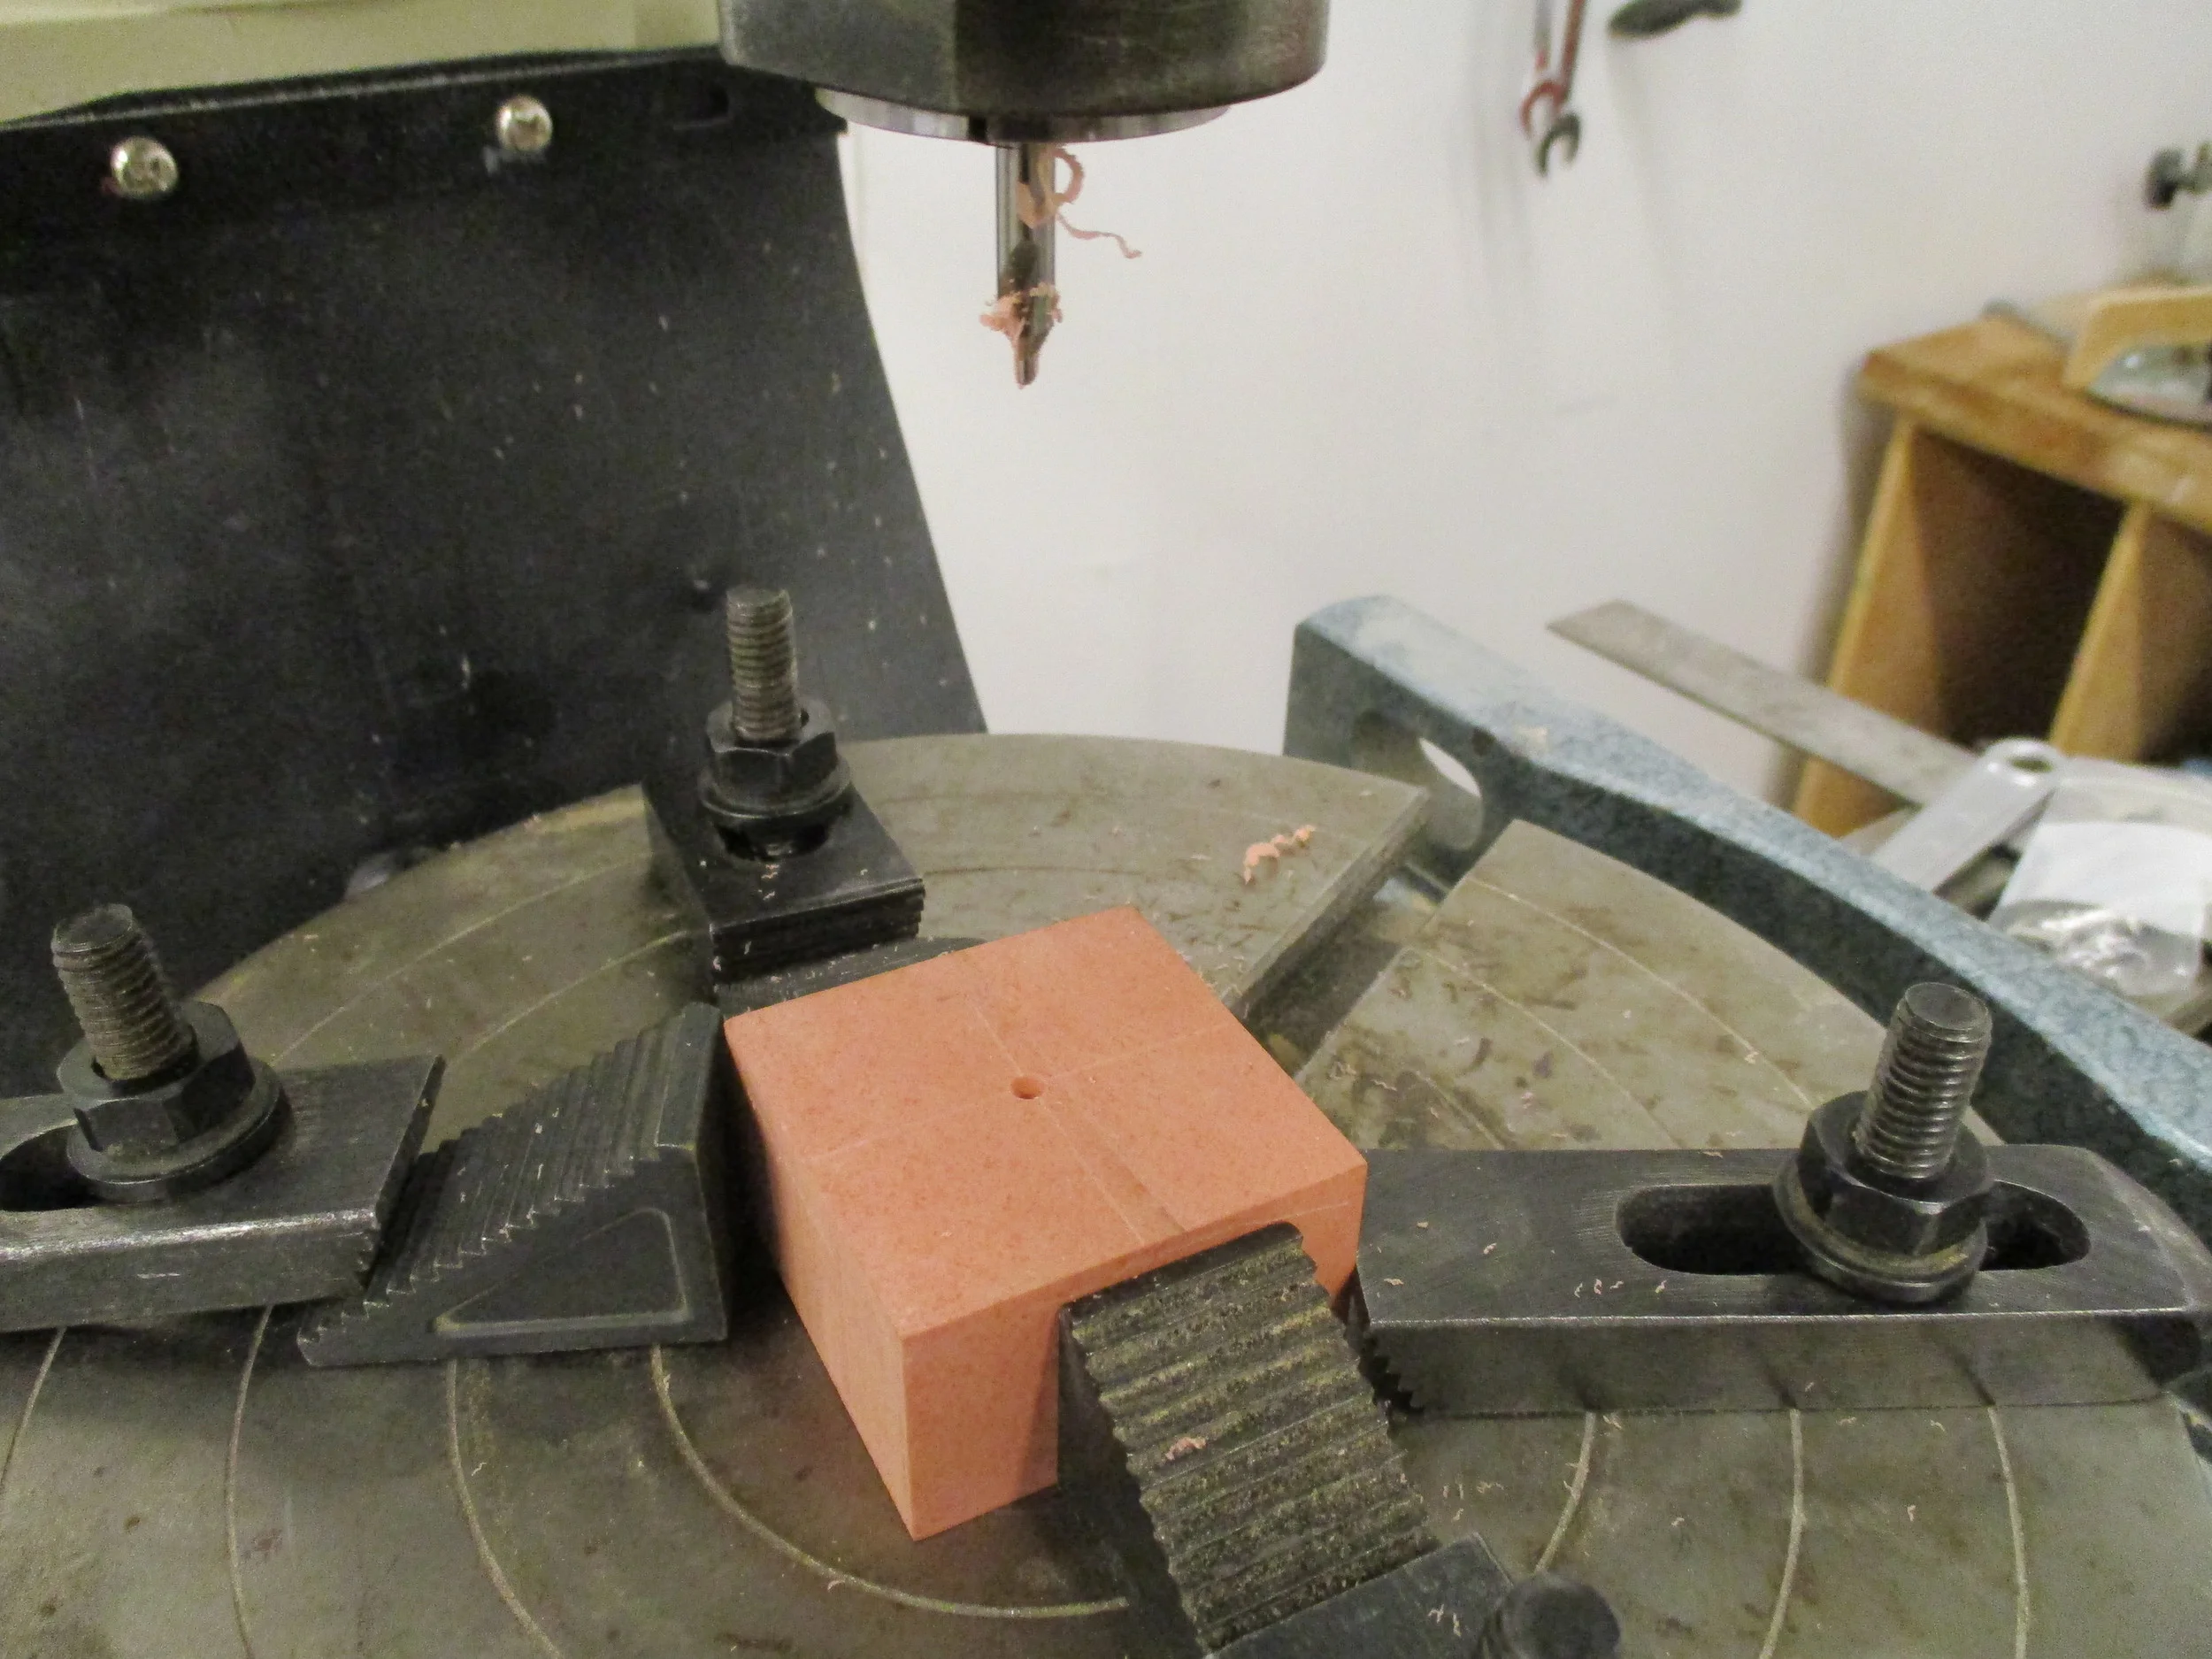
As this was my first rotary table operation, I tested tolerances and true-ness with a bit of ren-shape.
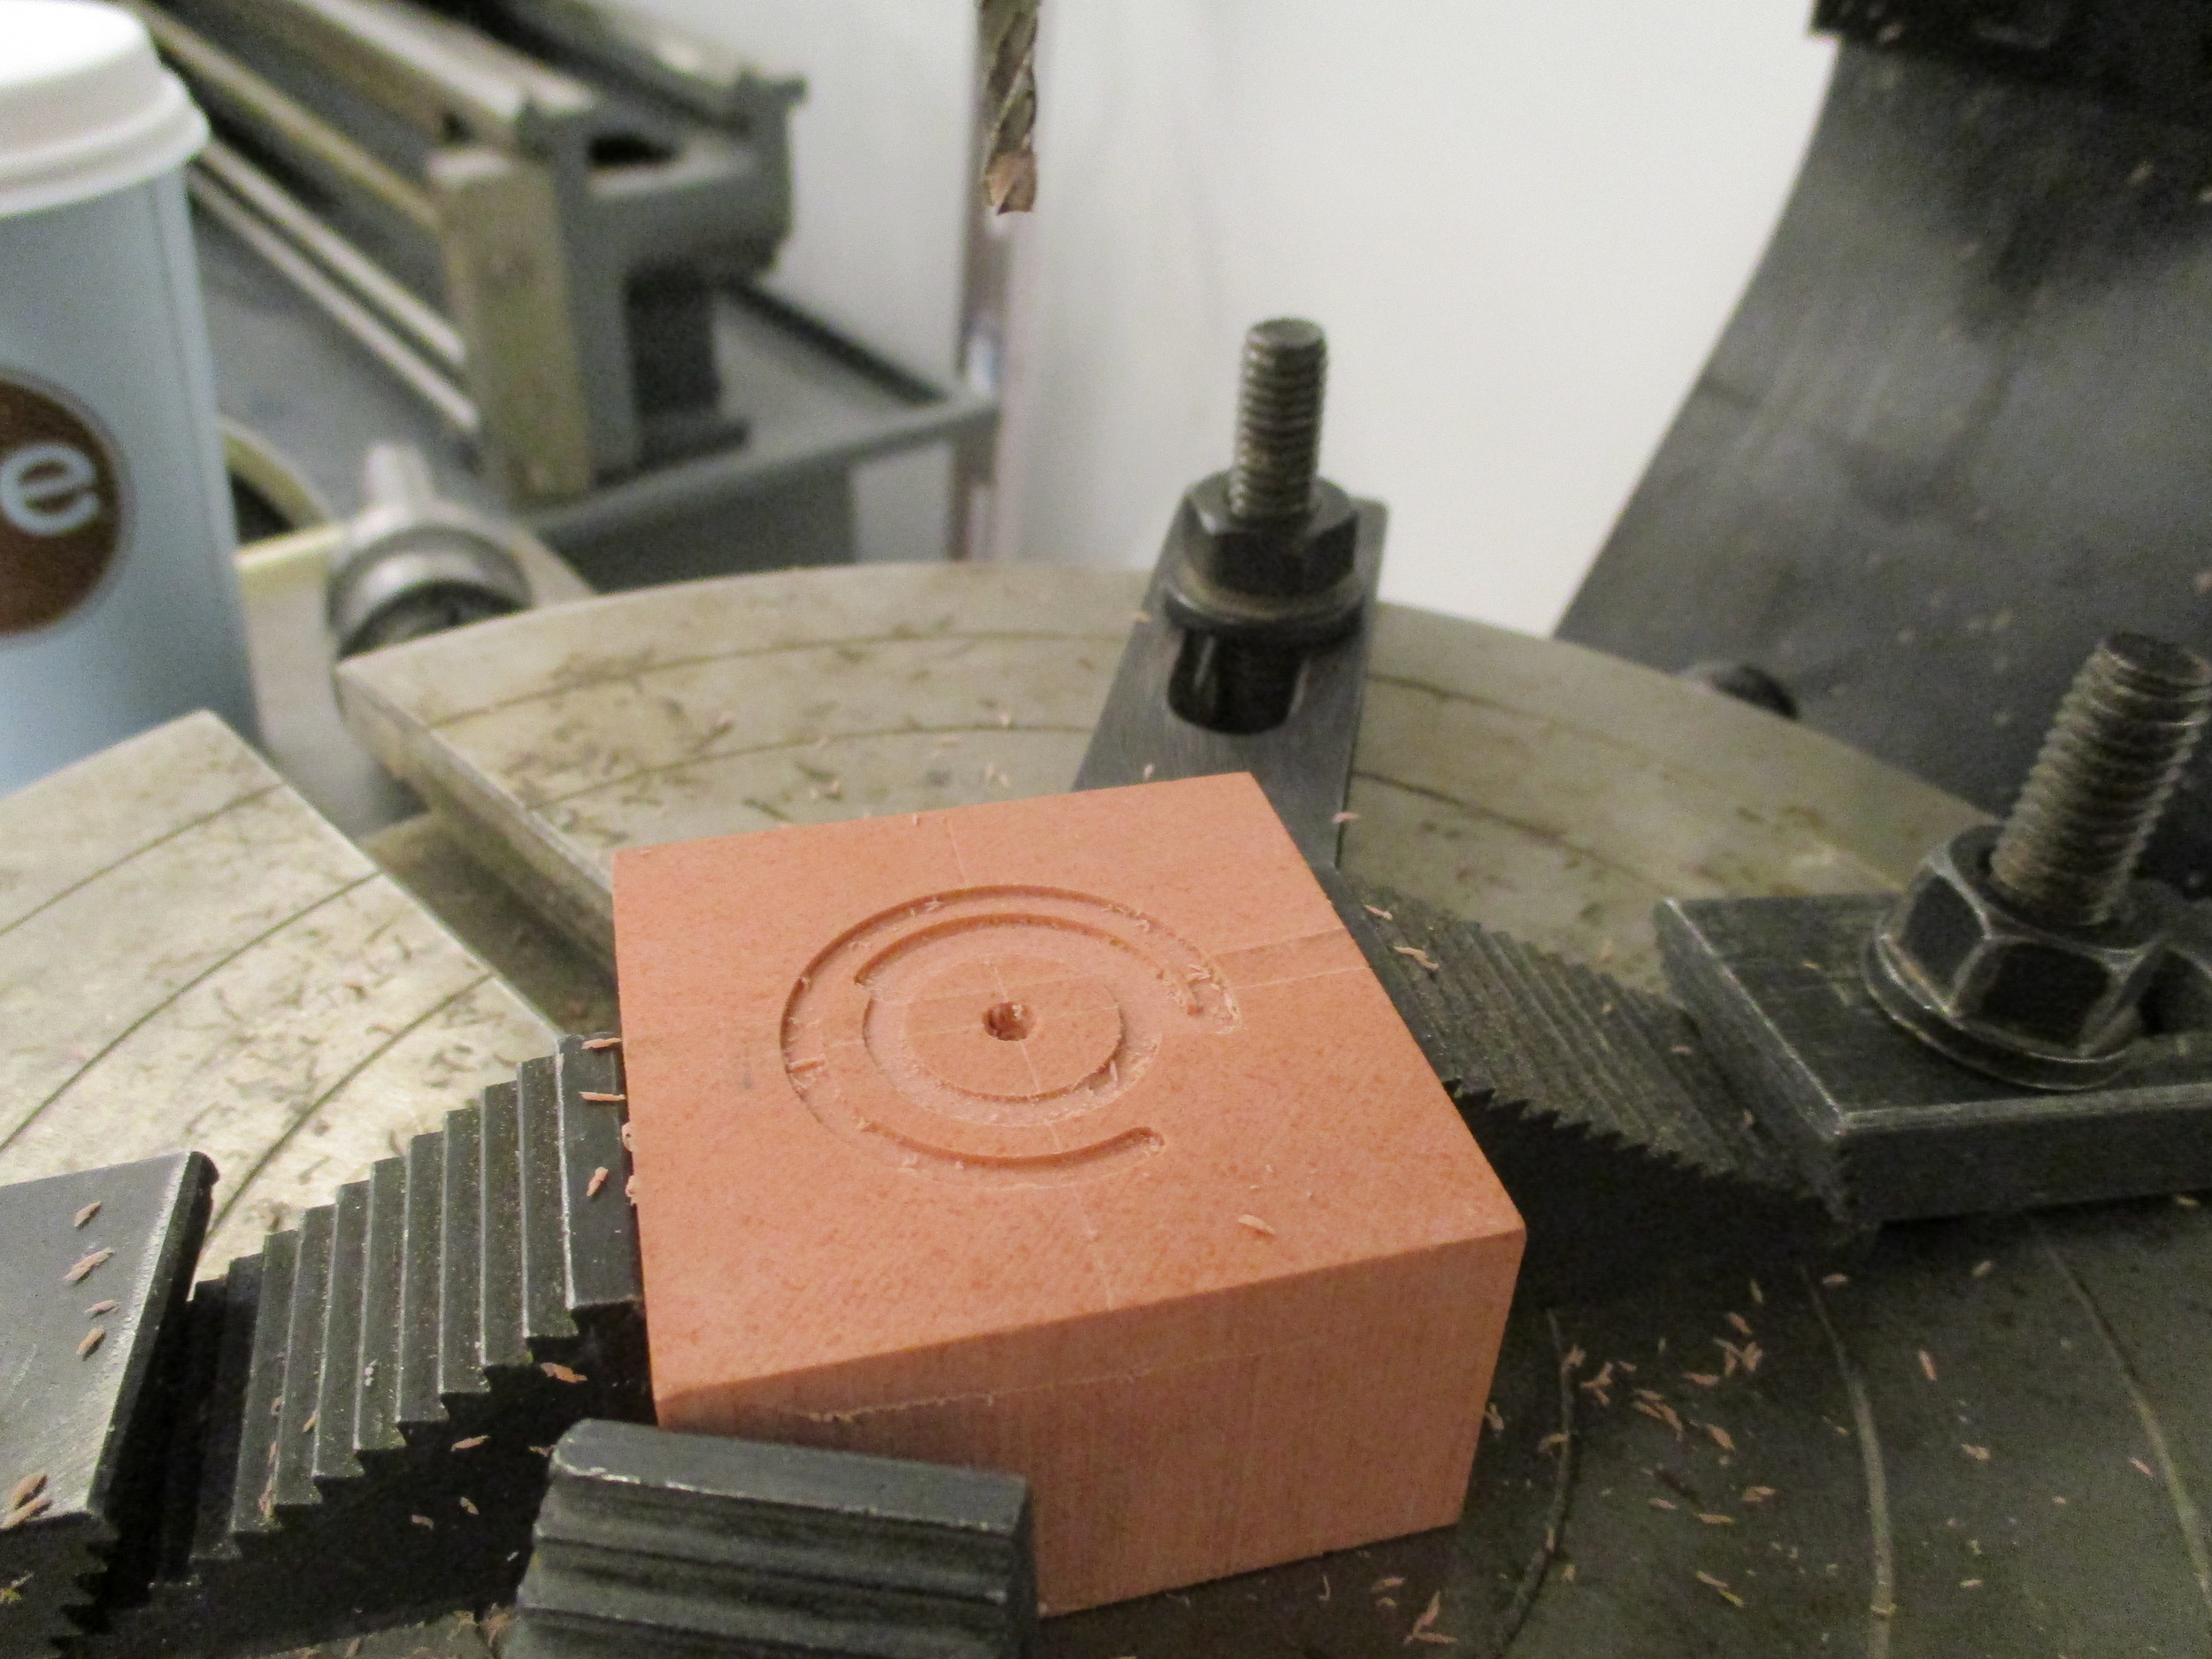

It looked acceptable, so I started to machine the ring- following suite from the ren-shape process.


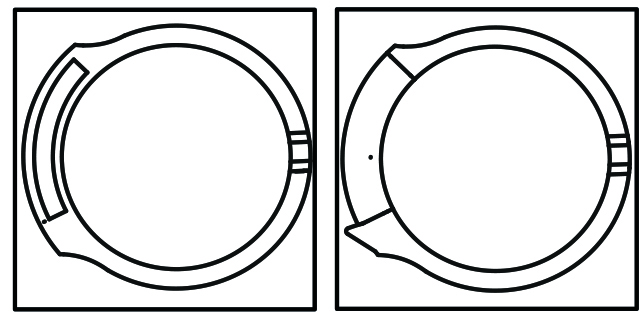
It worked fairly well. However, I milled out a large portion of the first ring. In doing so, I lost a lot of control (holding, for milling). Therefore, There were some errors in the first ring. Therefore, the second ring, I milled out without completely removing the entire sections, by using the concept of tabs. I was able to achieve much more precision. (the milled sections in the center were prep work for the nibs etc.)

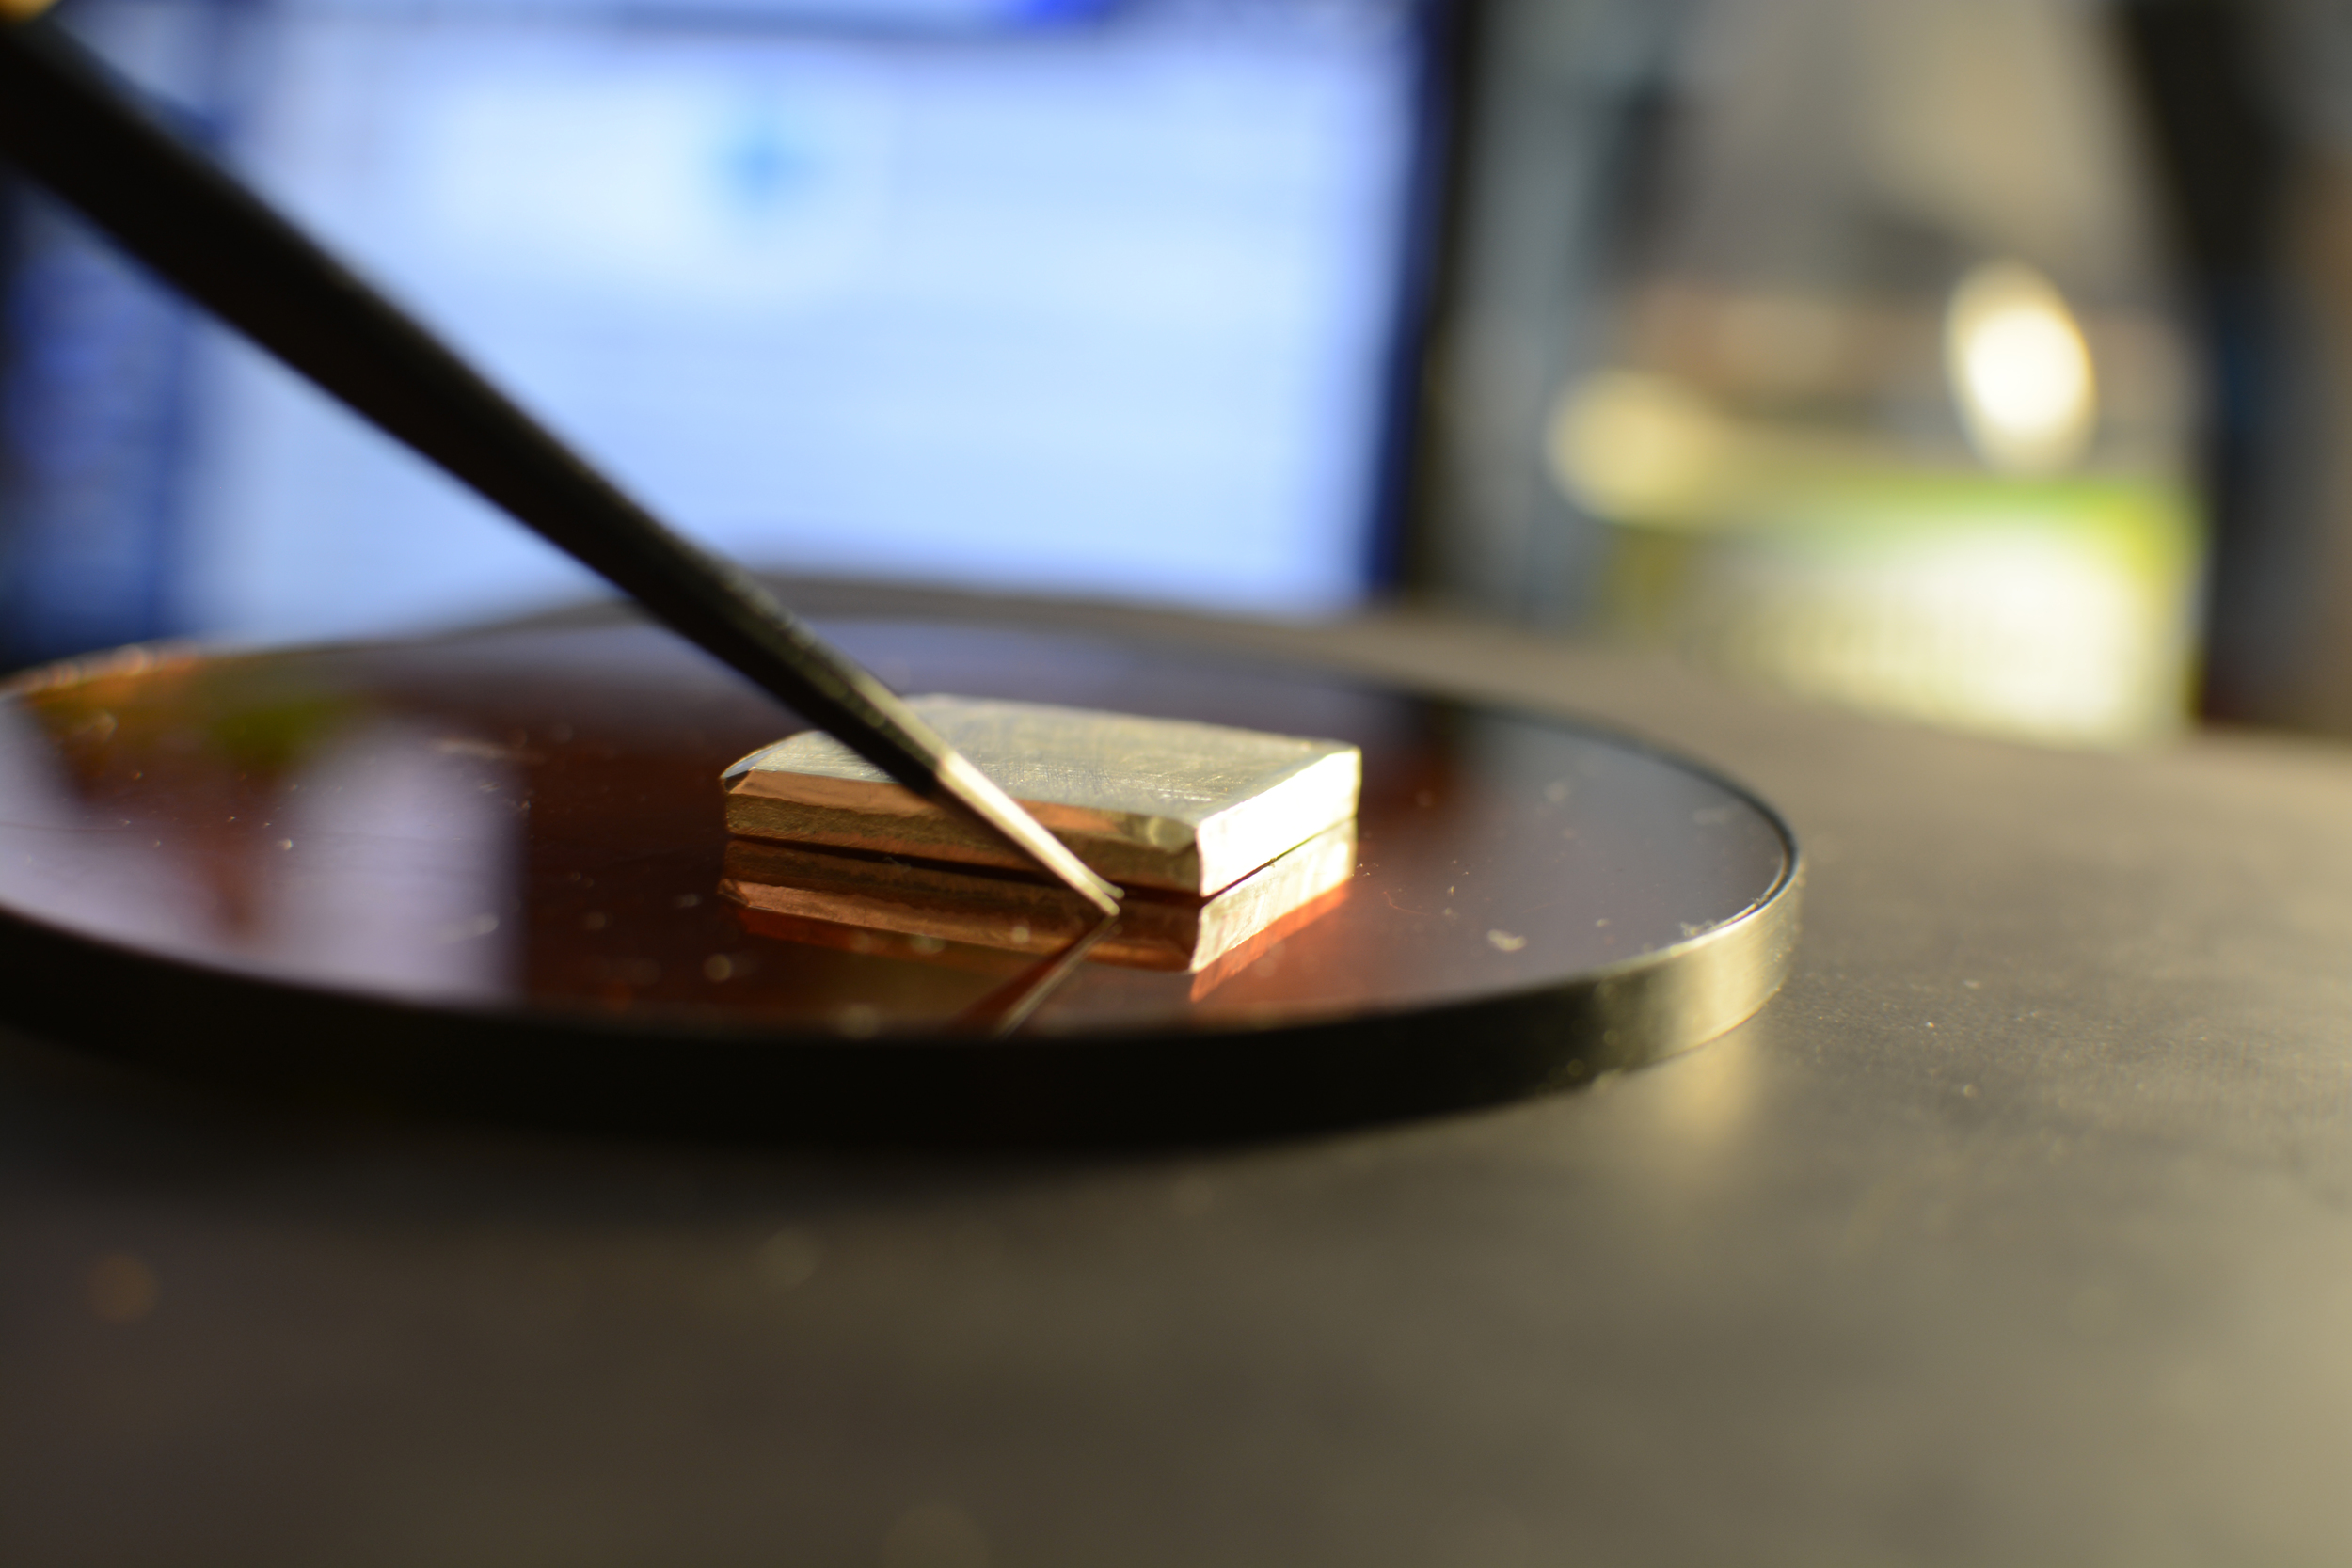
I know that I want to inlay metal (marry metals) to represent the measurements on the ring. I did a test of inlay today- soldering some brass and silver to some notches on the copper:

Having futzed with doing this by hand- I am finding it not only massively prohibitive in both time and money. Instead, I have decided to CNC some machineable wax on a Roland MD 40-A - which is a fine detail milling machine with a rotary axis.
This will then be cast in a silicone mold and sent to a foundry for casting.
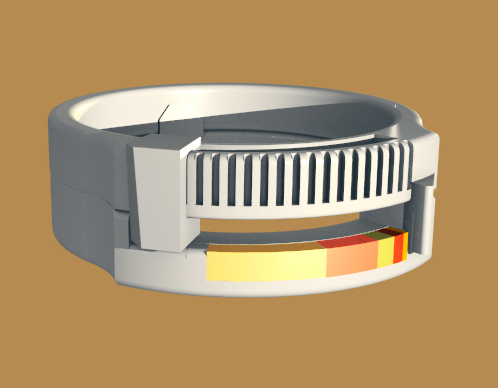
I made some adaptations to the design-
Including -adding slots every 32" of an inch with a 1/64" of an inch end mill (see the vertical slats on the top ring).
Secondly, as the ring is intended to be aesthetically interesting, I have included a "shelf" on the bottom ring to house a billet of different metal alloys which show the physical with of -
1/64" / 1/32" / 1/16" / 1/8" / 1/4"


So I duplicated the components and modeled them with tabs, set them inside the material I plan to use.

I cnc milled the file on a Roland MDX-40A with a rotary axis.

I made a few technical changes to the file to accommodate the milling process.

Because the wax is so very fragile, (I have broken/snapped/disfigured so many of these), I feel I might need to get these cast, and then buff and file the metal.
https://davidneat.wordpress.com/materials/modelling/modelling-wax/
So, in asking around, in NYC, there is this company in the diamond district which produces molds and does the casting called Taba.