Emulative Emergence finalizing for install
Hello. So things have come along a bit better, and after having some sleep and in conversation with Talya, the aesthetic answer came along.
I will smallerize the holes in the gallery walls with some nice birch. I will mount that and see how that feels. If it still feels like a limp carcass, I will mount a thin layer of natural latex to the outside of that frame, to unify the feel of the latex in the space.
I ordered lumber and am waiting on the order to arrive so that I can CNC the frame.
In addition I made an extension to the rack mount which will compensate for the less than interesting prodding of the first few days.
I also tidied up the DC switches, and confirmed their functionality. Because these motors are wholesale, I expected some to fail, and low and behold one of them did. I bought extras and will replace the malfunctioning one tonight.
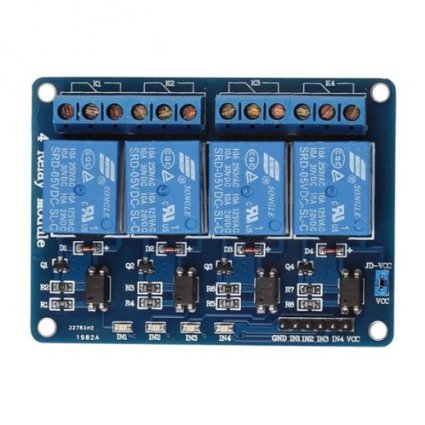
In addition my relay modules came in the mail. Instead of controlling a dimmer for AC lights or making my own LED array I decided to have multiple clip lamps inside each module (to go on and off in tandem with certain commands).
This module :
http://www.amazon.com/SainSmart-4-CH-4-Channel-Relay-Module/dp/B0057OC5O8/ref=cm_cd_ql_qh_dp_t
and here is a blog about it:
http://arduinotronics.blogspot.com/2013/01/working-with-sainsmart-5v-relay-board.html
also a good blog on the sleep vs enable on the easy driver:
http://staceyw1.wordpress.com/2011/01/08/test/
I got this up and running as well. It does a great deal to add effects to the motion.
test of 3 days of time lapse:
Gallery has walls the many and various methods I tried to extend the width of my latex has failed - to much shagrin. That being said, a solution has been arrived at, and the success of that solution will be revealed at the install (as the excess will be mounted to the inside of the cutout on the gallery wall. Friday night the gallery is coming to collect the 1st node. I must remember to bring power supplies - tools etc. However, a quandary presents itself, as I will be assembling the second node this coming week (and Boris, my amazing boyfriend) has been doing much of the prep for assembly off-site- I will need to find a solution to needing specific tools in two spots. I am currently cutting an enclosure and have ordered fuses to wire a fail-safe mechanism which will blow the fuse and not allow current to flow to any component If any motor draws more current than it is rated for. In addition I will wire an LED across the fuse which will not light if the fuse blows, alerting the gallerist.
I have also ordered two AC relay boards with 4 outs per and instead of broaching triacs for AC control, I am going the on/off route, and will dim the lighting by having multiple lights going on and off behind each node.
I am fearful that I will be unable to code in the interactivity before the second opening (May 1st) as I have even been unable to really code the stepper even, because of the aforementioned latex issue (which really sucked a good deal of time ) That being said, I am prioritizing building a robust and safe installation over having an interactive one, as that aspect is more important to me than having something be interactive. I am doing as much physical/shop stuff today as I can and saving the code for the space, as I really do feel having it in the space, will tell me how certain motions might be perceived better.
Crossed fingers y'all

[galapagoslayout.jpg](http://itp-thesis.s3.amazonaws.com/hm825-1398267304825/galapagoslayout.jpg)

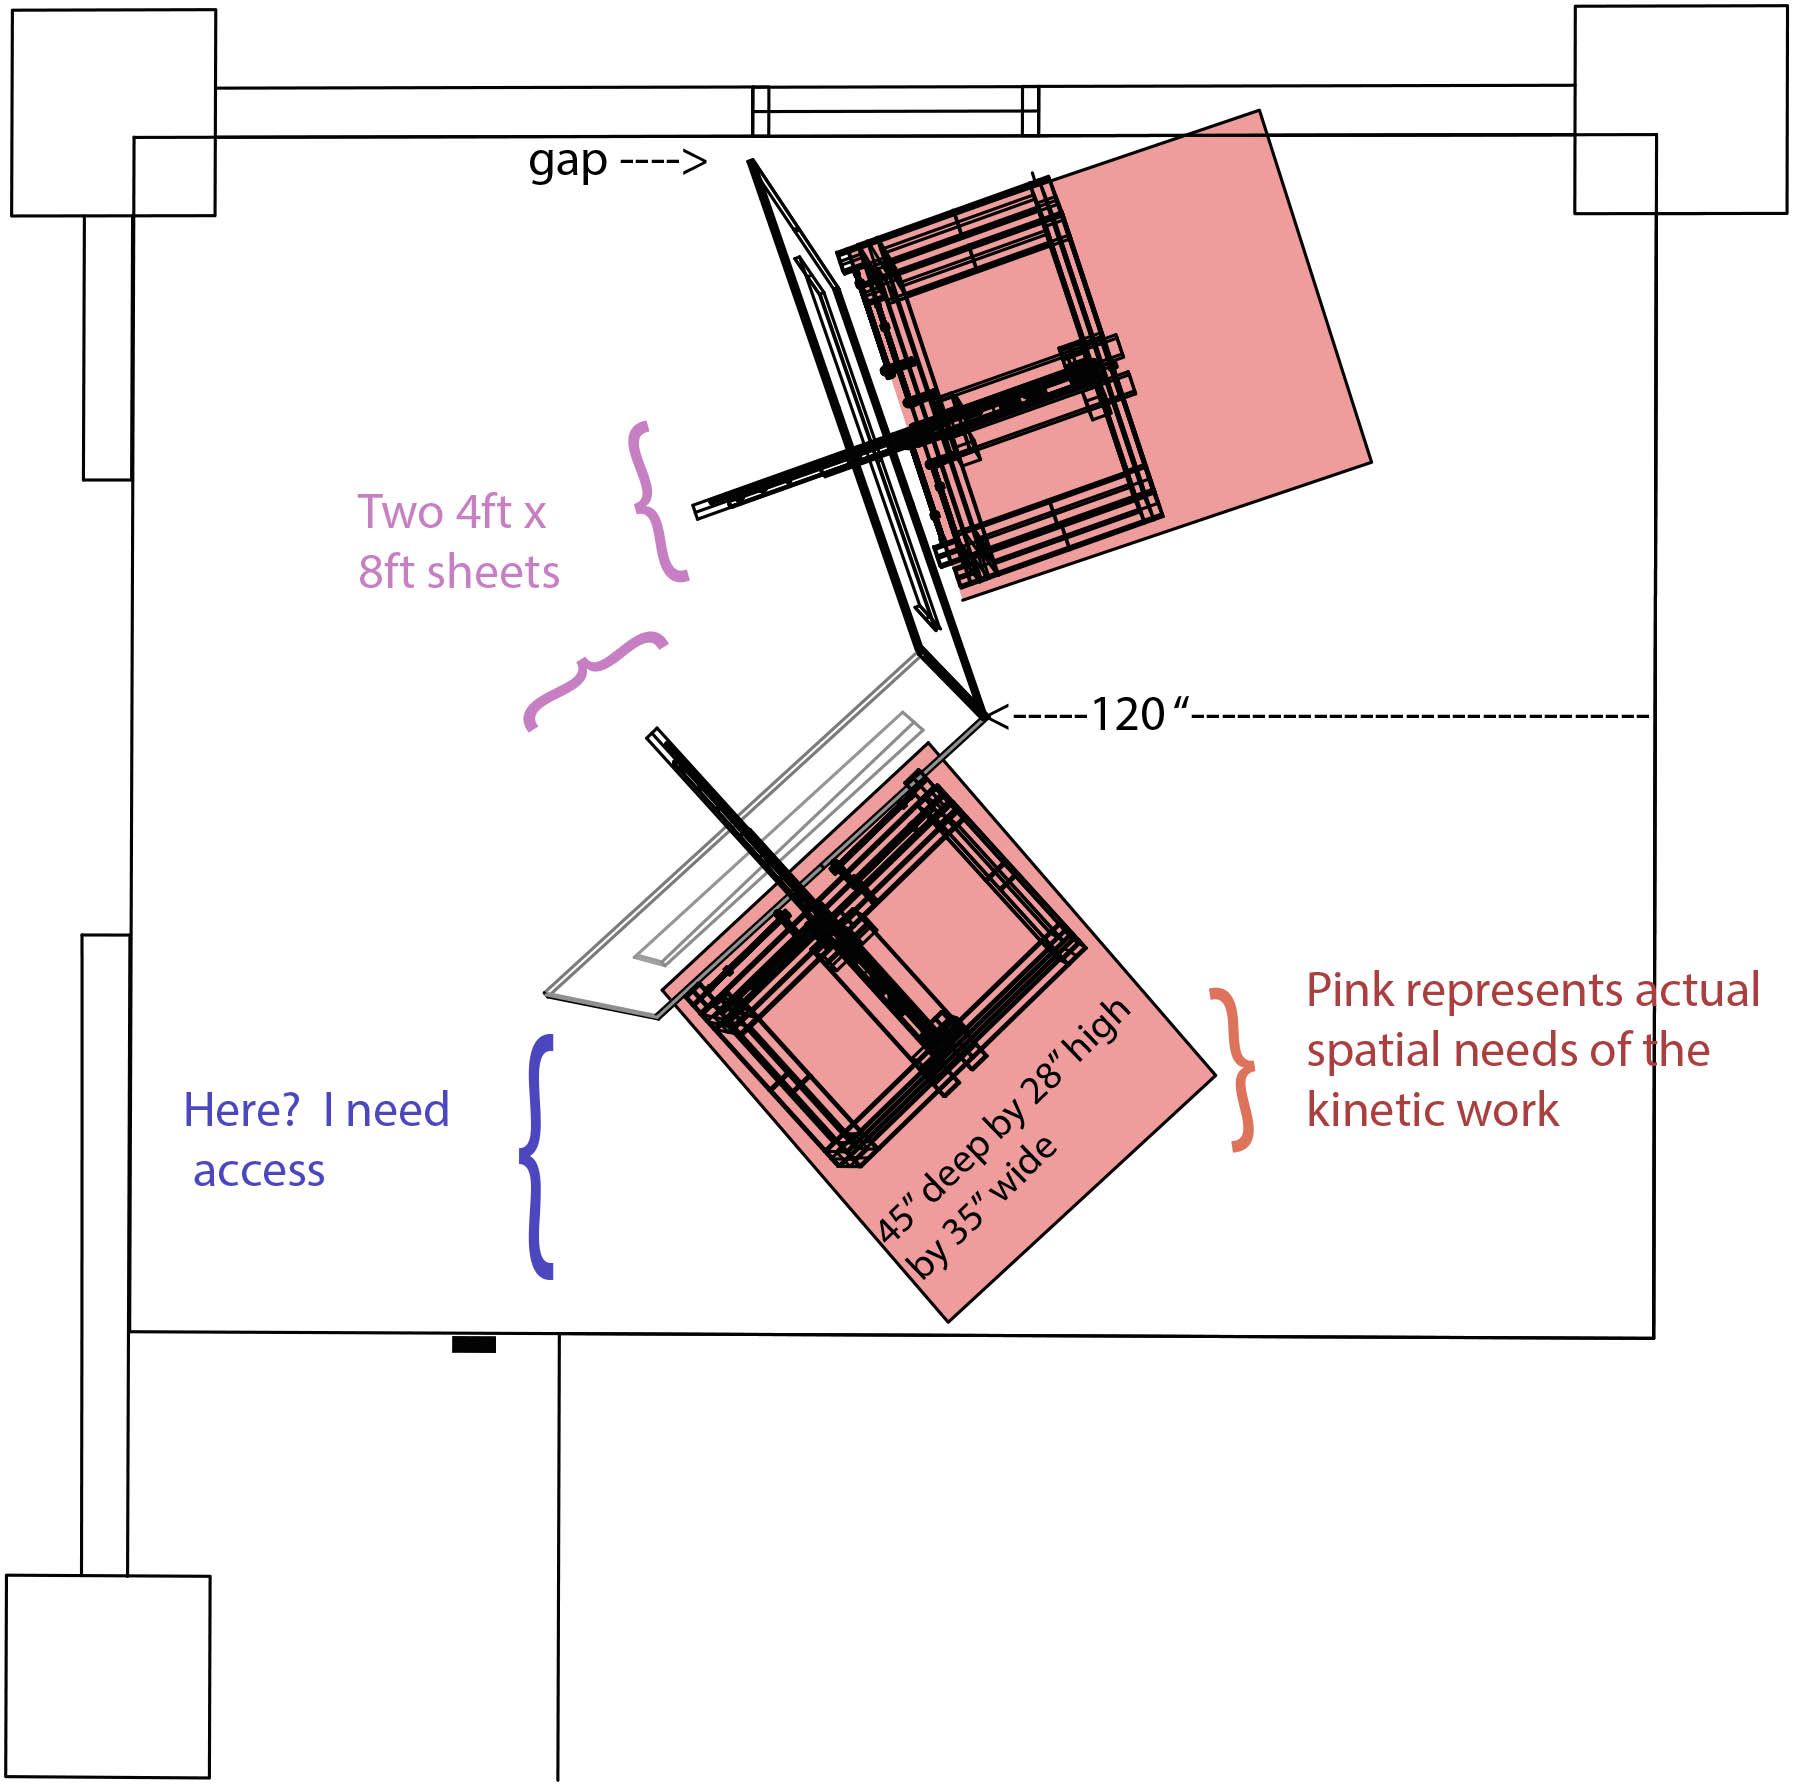

Meeting with a gallery guy, Wyatt, who is awesome, today to purchase materials and flush out the details of the install. It has been downgraded to two units/nodes - largely because I feel it would be far too cramped to have three, and also, I do not want them in a straight line against a wall... for various reasons.
There are two openings, one on Saturday night at 7pm and one on May 1st. For the first opening, I will have one node running on a code, just running movements etc, without interactivity. I will have the rubber/latex affixed in the gallery for the second node but with no kinetic structure behind it.
For the second opening, I will have the kinect, I will have lights interacting as well, and I will have the node/brain system implemented as well as fail safe aspects of the electrical/mechanical stuff to notify the gallery of if something is wrong.
It took forever to mount the switches properly. like forever and have them coded for the setup the way I wanted.
I worked a great deal on the code this weekend, giving my DC motors brains of some sort, without using a single block function.
You can find the new Repo of this code here:
https://github.com/hannahmishin/NODECODE-braincode-THESIS
This had me tied up and tangled - I however would loosen the knots and then get myself in another quagmire. This entire coding process was to enable an easy methodology for implementation of behaviors- meaning - once i am ready, I can plug and play with the DCs without having to worry too much about code.
I was so tangled up I printed the code and translated it.

That video is a DC motor knowing which direction it was going when it hit a switch and knows to back itself off the switch and then stop itself.
For example I simply coded a "GO TO HOME" position in like 2 seconds:

So, YAY!
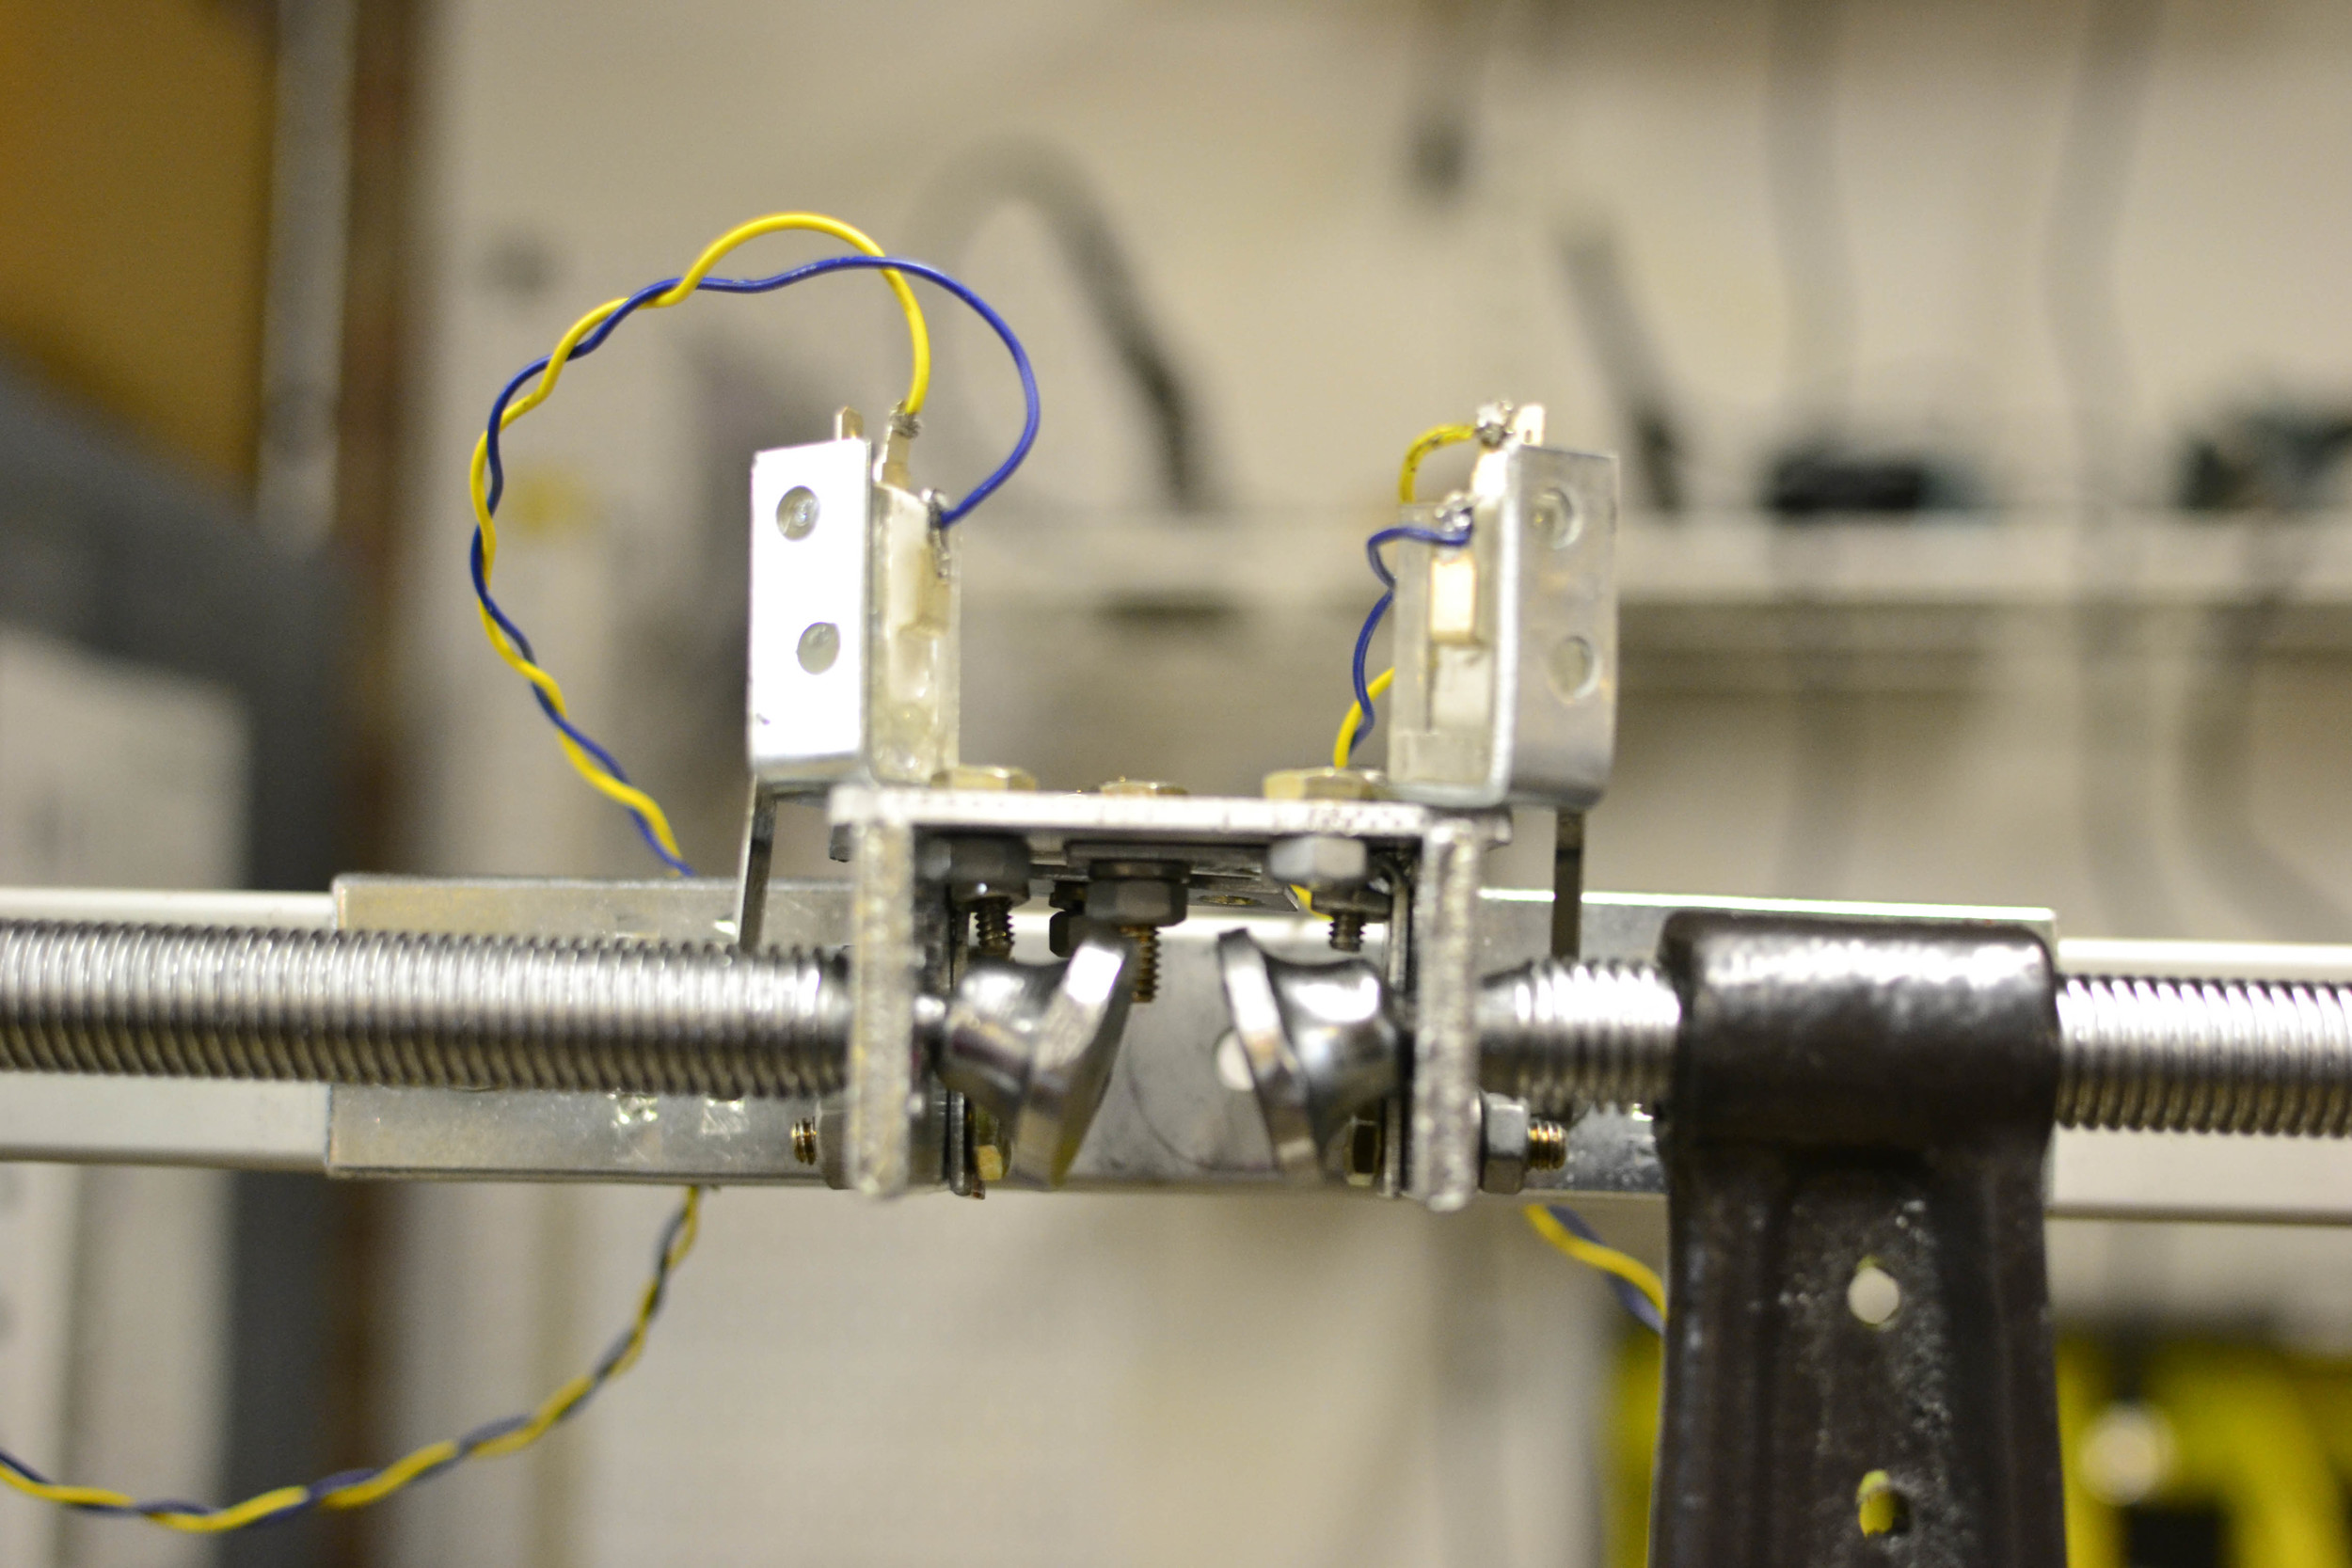
Mounting the limit switches was somewhat problematic, as occasionally, though positioned properly, because of the length of the metal switch, the drive would wiggle itself between the switch arm and wind itself into a pickle.
I need to be able to trust that when I tell the motors to run, that they will do what they are told.
So I added some extensions. Though I promised with this project, I would not be using the "hot glue process" - I did.

This is the least ugly of them (which is fine). I was concerned about the rubber flipping the switch, but for the first test of this, it was not an issue.
I also added grommets to the rubber latex thing, as rips or tears in the latex would cause the latex to tear.
[thanks Antonius and Ben Light!]

I took some videos of the rack and pinion etc, however, if you've noticed that the quality of imagery is better, it is because I am using my DSLR, and believe it or not, I've never shot video on it, so those videos I thought I took, I did not.
This is some rubber being manipulated by the DC Screw Drives (aptly named TL, TR, BL, BR);
Here are some stills ('casue to film this testing process - to get from right to left for each drive is like 12 minutes)

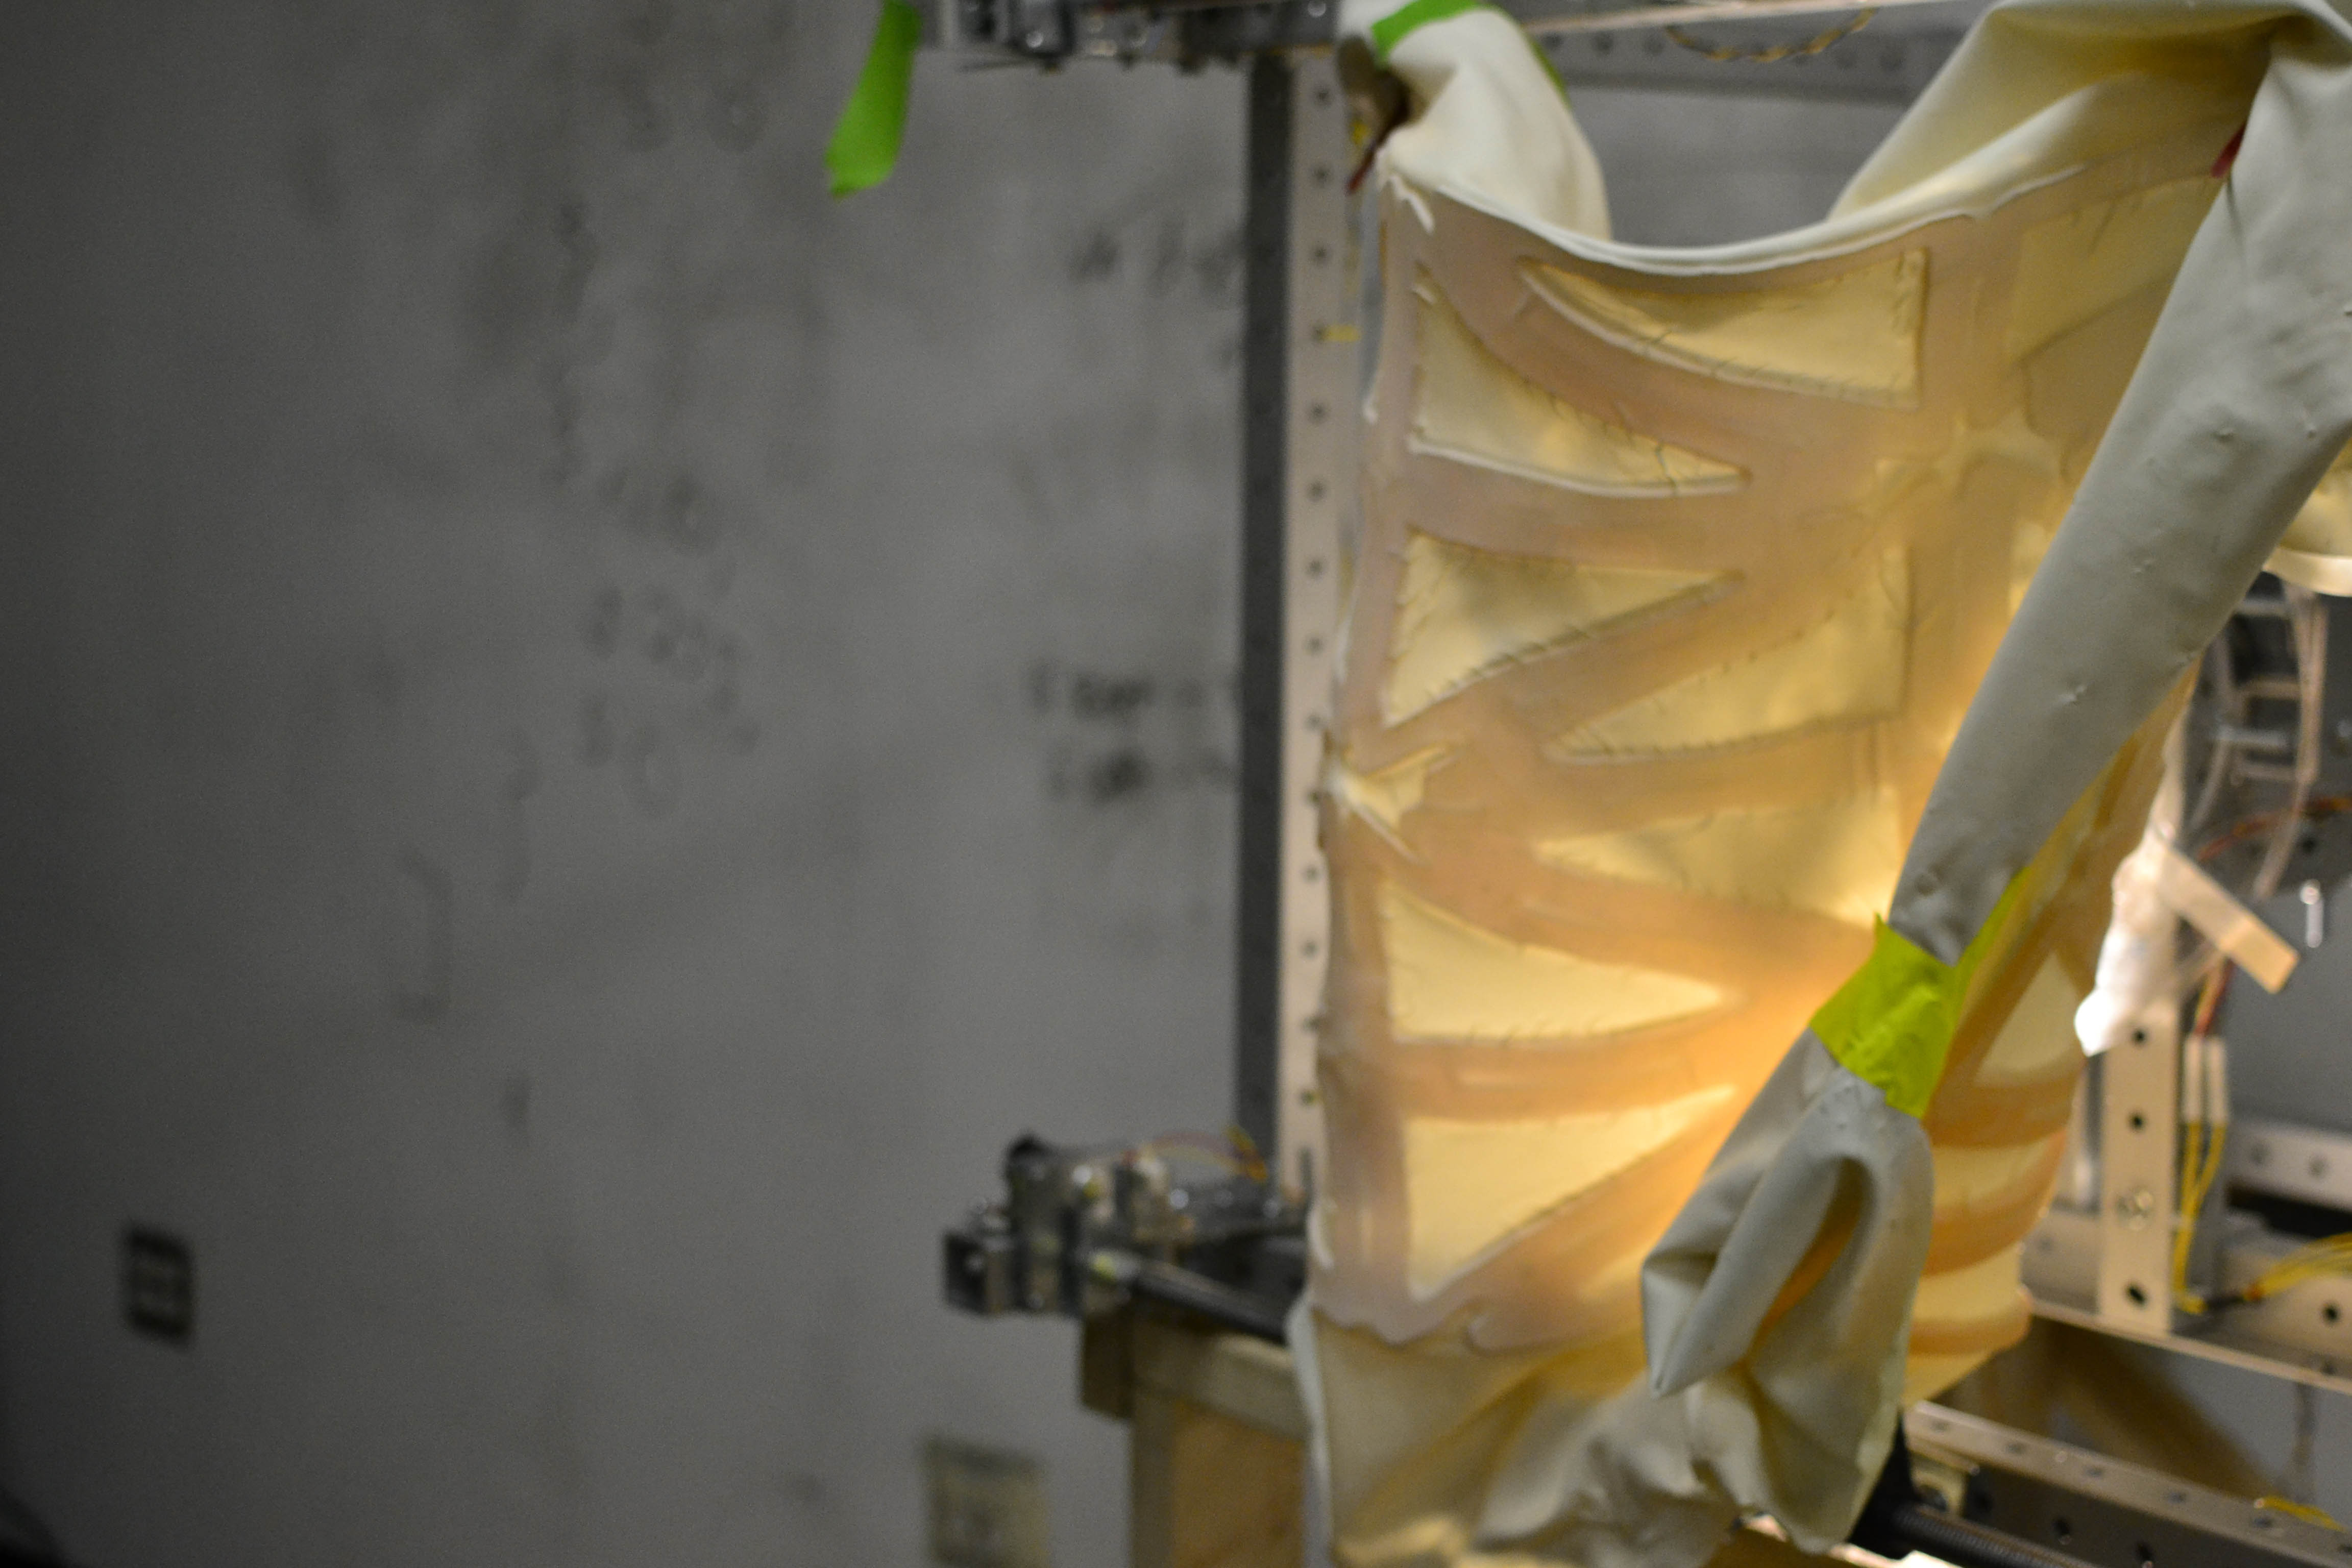
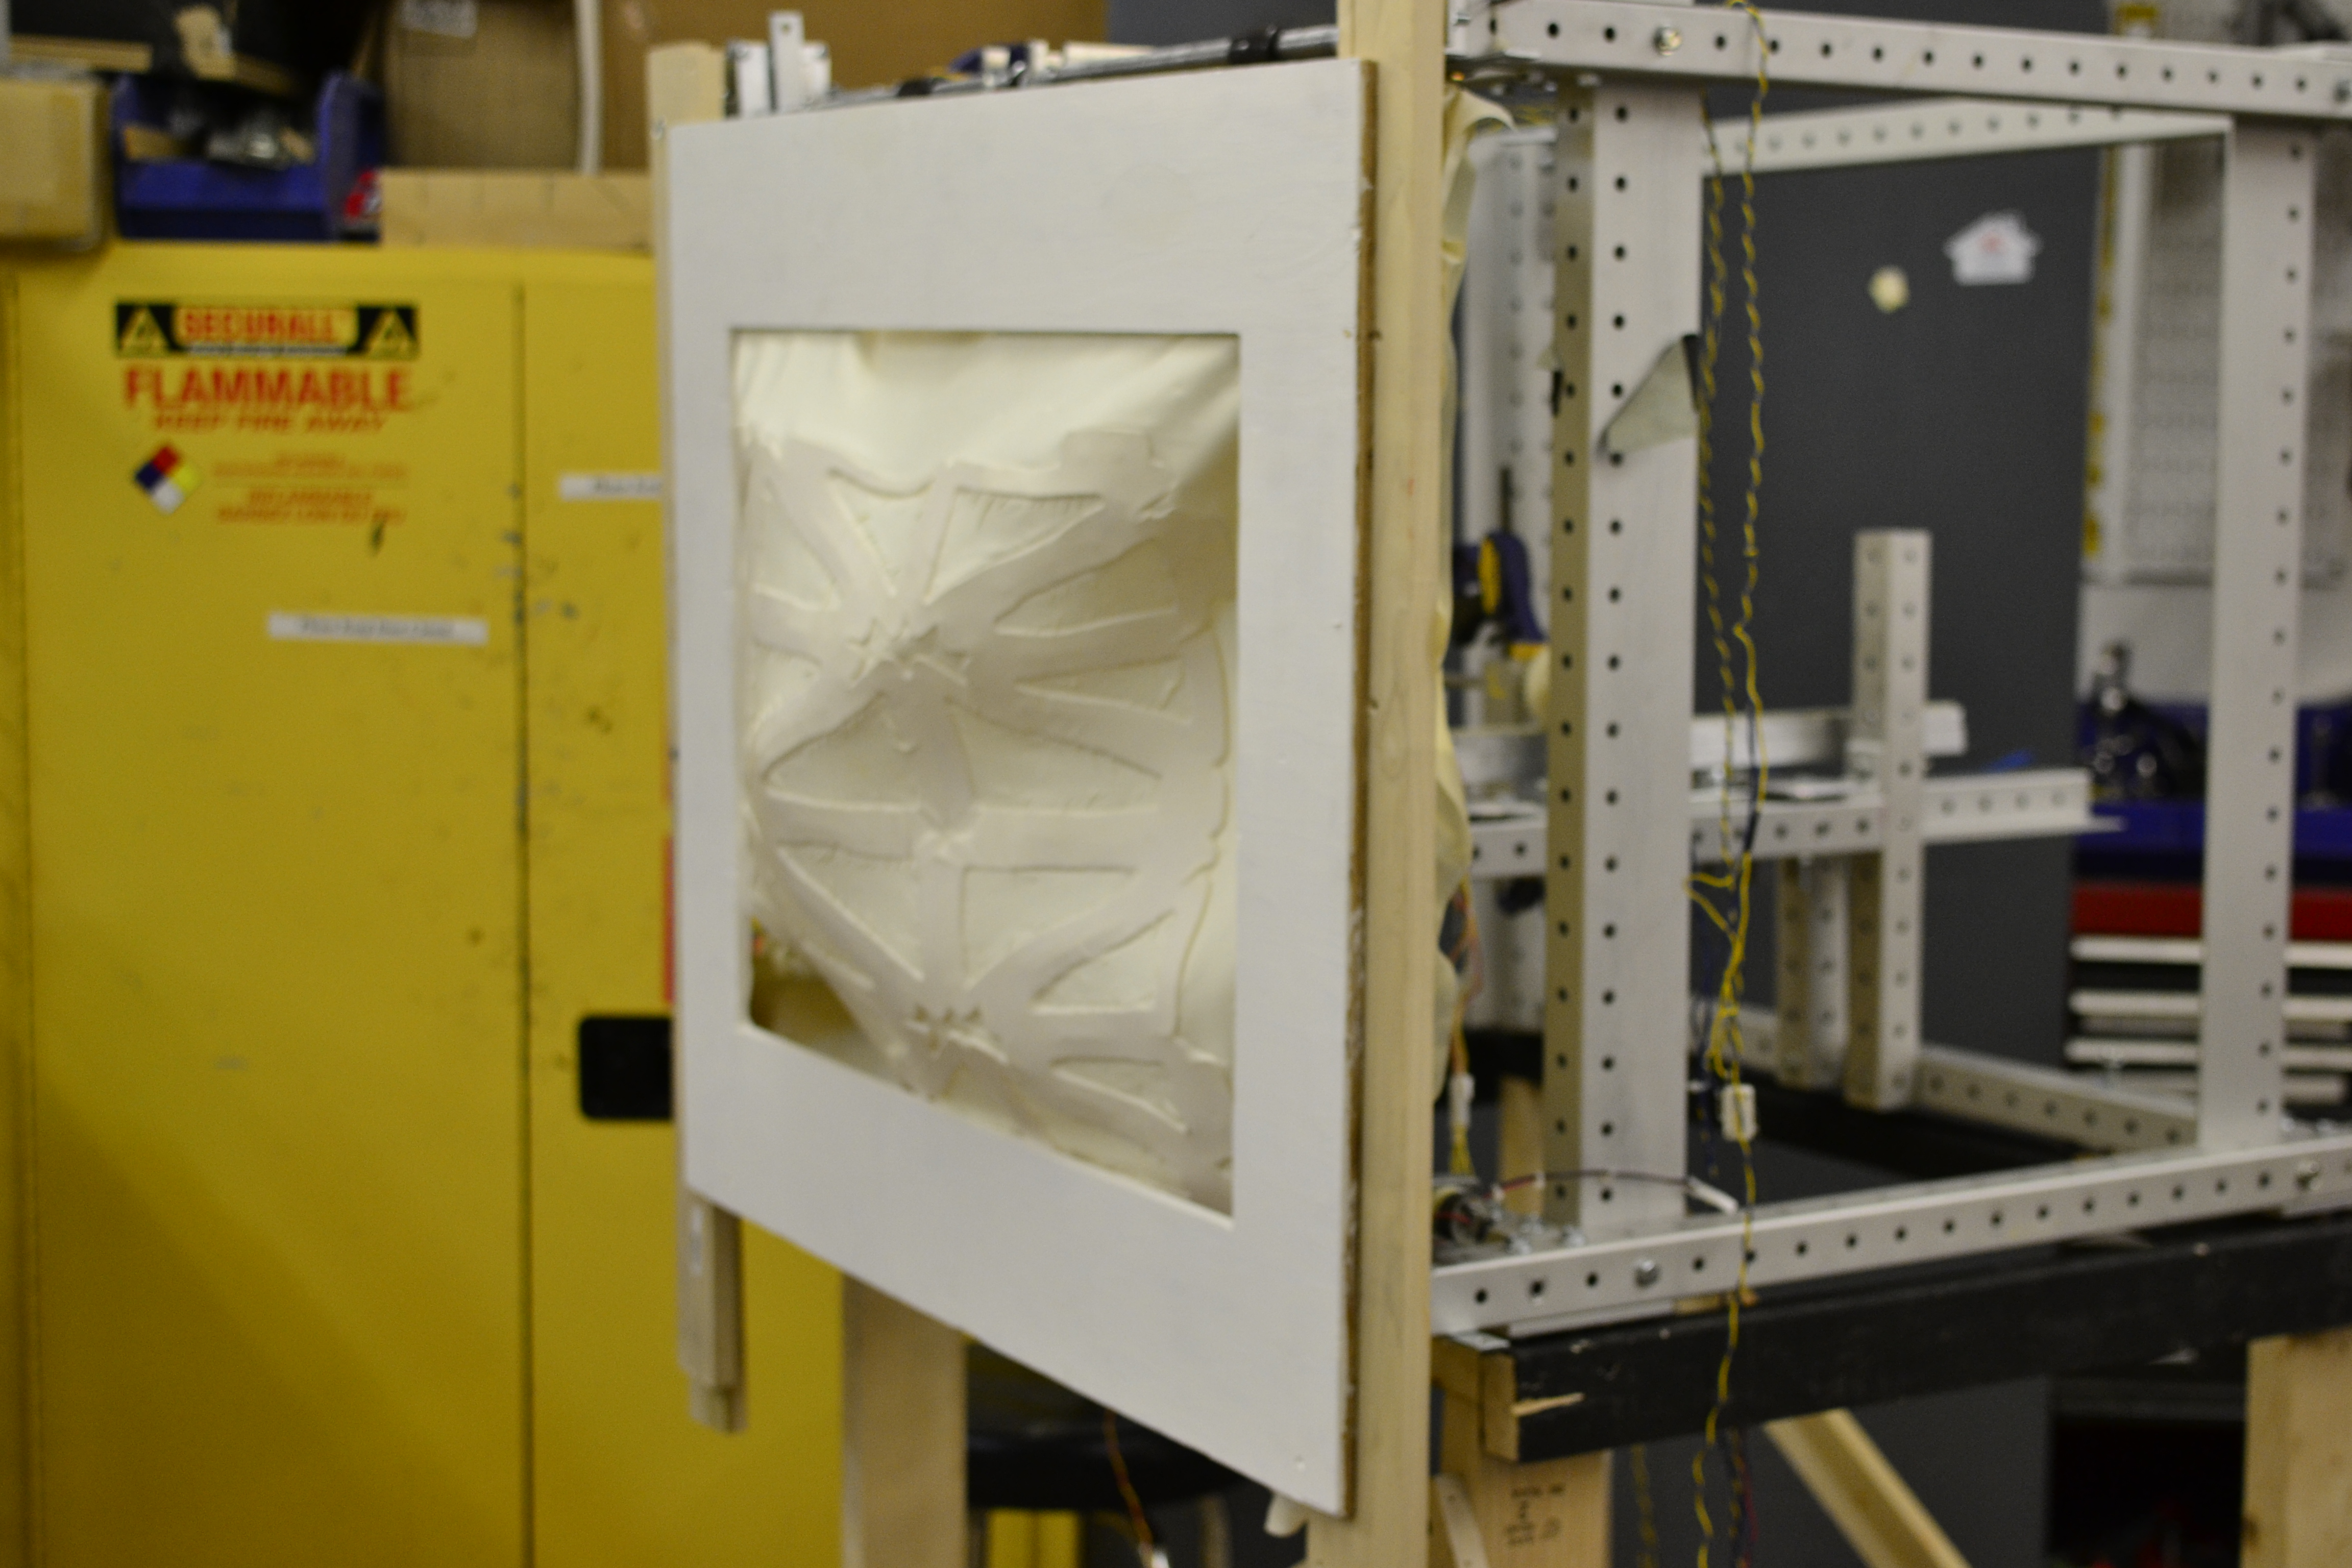
I taped up the edges to free them from getting caught in the rotation of the motor. For the install the excess will be mounted to the inside of the cutout of the wall the rubber will be shooting out from (see prior shots, that white frame represents the wall I am building in the gallery).
This also taught me that I will need more excess for mounting - like a lot more.
So I bought some more latex! yay latex!
It was both a glorious day and a sad sad day as when beginning to code for the stepper I ended up frying the Big Easy.... he smoked... a lot. So much for coding the stepper tonight.
I am meeting Eric Rosenthal tomorrow to go over any issues.
I melted down the plexi globe to deform it (as a straight up circle is less interesting to me)

I temporarily mounted the latex to the frame
When I did, I realized (as by design, but I had forgotten!) that I had made the frame too large
So I chopped the top by approx. 3 inches

I also needed to move the rack and pinion inside the frame and raise it to meet approx in the middle of the rubber
So after some tears I re-made the set-up

It still might be a bit low, but I am heading in now to re-temp-mount the latex and see.